Introduction to 7 Layer Bars
What are 7 Layer Bars and Why Do We Love Them?
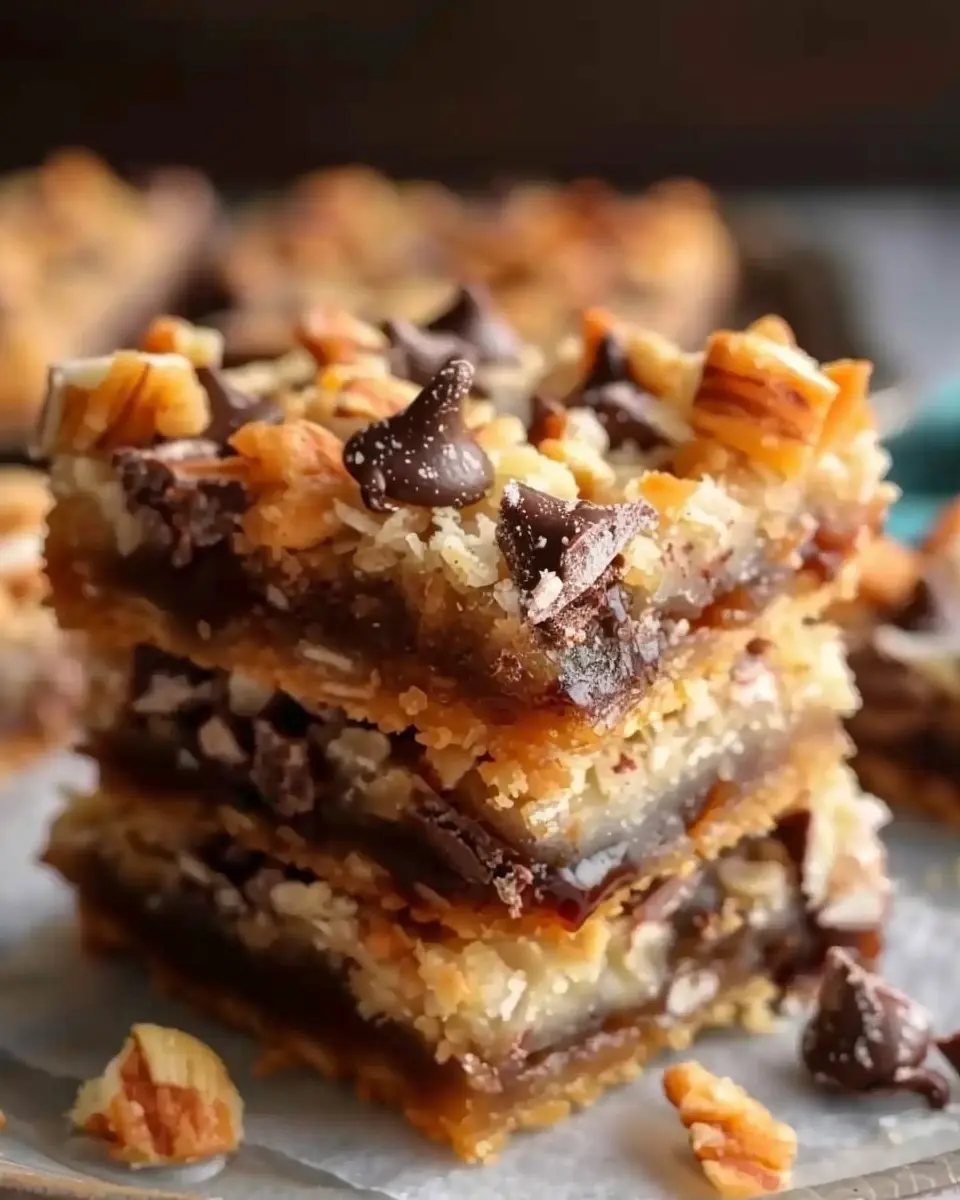
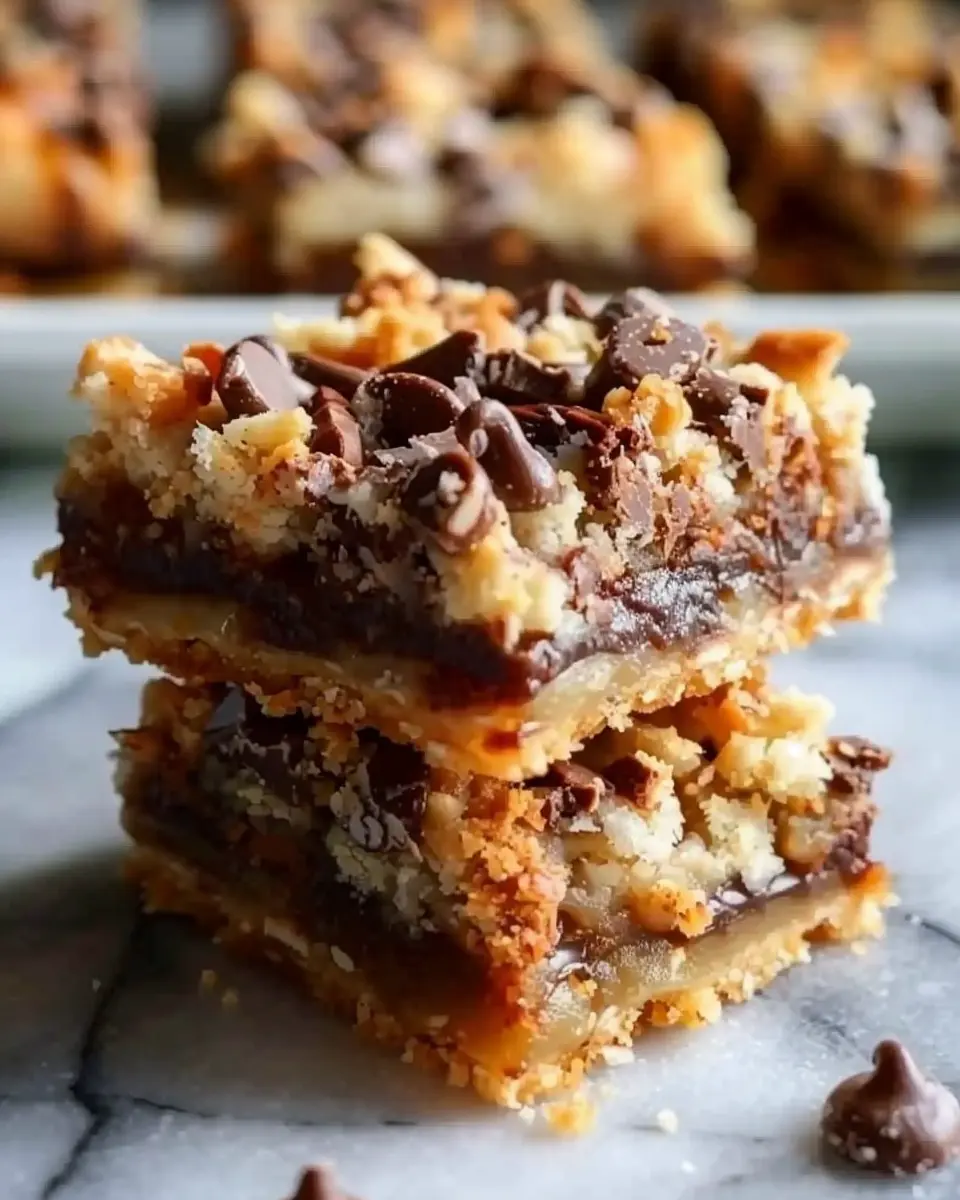
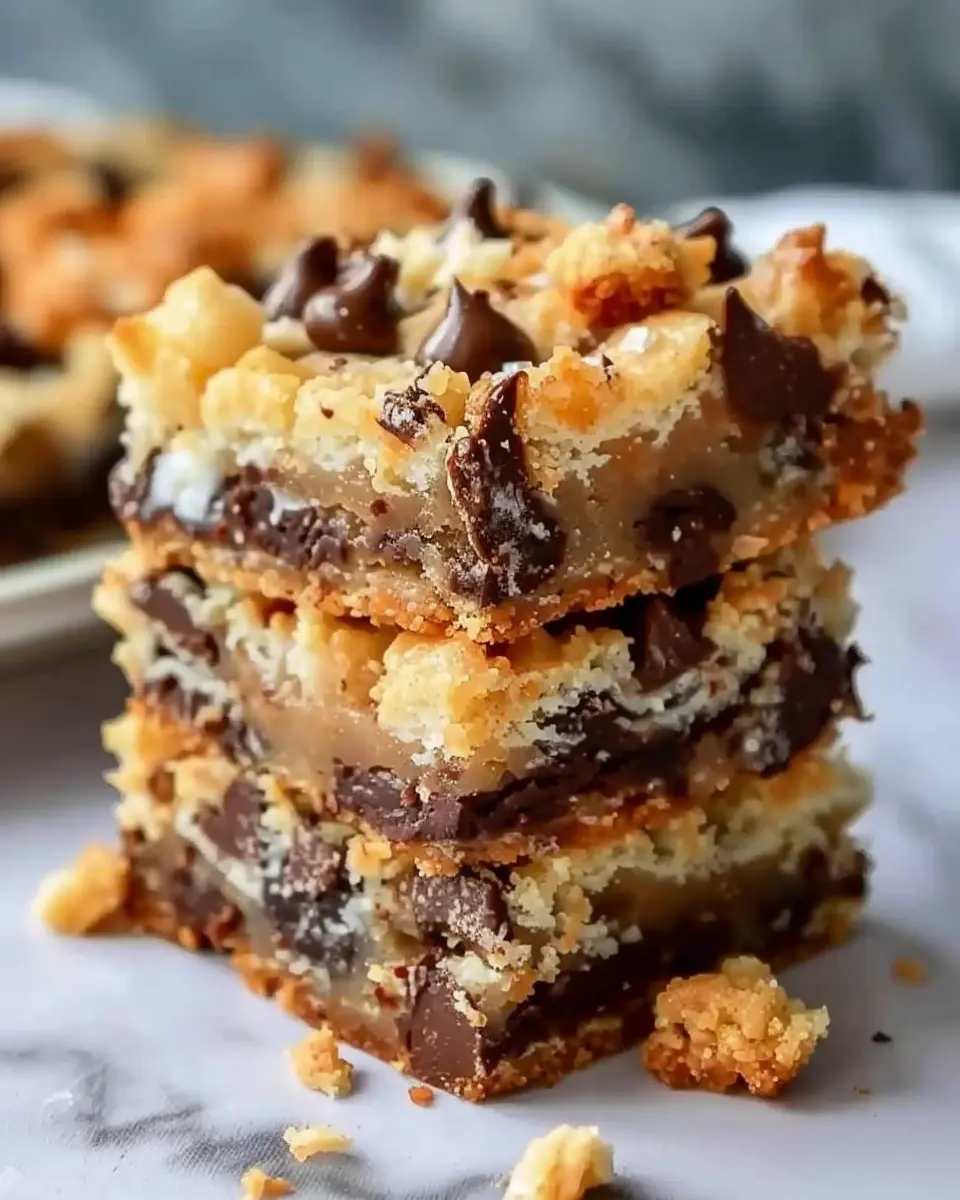
If you’ve never had a chance to indulge in 7 Layer Bars, you’re in for a treat! Often referred to as Magic Cookie Bars, these delightful squares are a no-fuss dessert that combines a variety of flavors and textures into each delicious bite. But what exactly makes these bars so special?
Picture this: a buttery base layer, married with a rich mix of sweetened condensed milk, chocolate chips, shredded coconut, and crunchy nuts, among other ingredients. Sounds heavenly, right? Their gooey, chewy, and crispy layers harmonize beautifully, creating a symphony of taste that has made them a favorite at potlucks, family gatherings, and cozy nights at home.
The Charm of Layered Goodness
One reason we’re smitten with 7 layer bars is their versatility. You can easily switch up the ingredients based on what you have on hand. If you’re feeling adventurous, consider adding peanut butter chips or dried fruit for a creative twist. The customization possibilities are endless—making them not just a dessert but a canvas for your baking creativity!
These bars are also incredibly easy to make. Simply layer your ingredients in a pan and let the oven work its magic. With minimal prep time, you can whip up a crowd-pleaser in no time. Who doesn’t love a dessert that requires so little effort yet delivers big on flavor?
A Nostalgic Favorite
For many, 7 layer bars evoke memories of childhood baking with family or friends. They’re a dessert that encourages togetherness, and nothing speaks to that sentiment quite like gathering with loved ones around a plate of gooey treats. Plus, if you’re pressed for time or new to baking, these are a great way to impress your friends without breaking a sweat.
So, whether you’re drawn to their simplicity or the way they bring people together, 7 layer bars are undeniably a delicious addition to any dessert arsenal. If you’re ready to create your own batch of this beloved treat, head to the recipe section for a step-by-step guide!
If you’re interested in more baking tips, be sure to check out sources like The Kitchn and Serious Eats for expert advice and inspiration.
Ingredients for 7 Layer Bars
Creating the perfect 7 layer bars is all about gathering quality ingredients. This irresistibly sweet treat has made its place in many homes for its rich, layered flavors, and it’s simpler than you think! Let’s dive into what you’ll need to make these bars a hit at your next gathering.
Essential Ingredients
For a delightful batch of 7 layer bars, stock up on these must-haves:
- Graham Cracker Crumbs: Around 1.5 cups to form the base layer, bringing a sweet crunch.
- Sweetened Condensed Milk: One 14-ounce can; a key ingredient that binds all layers together and adds creaminess.
- Chocolate Chips: A generous 1-2 cups (semi-sweet or dark) for that delightful chocolatey flavor.
- Butterscotch Chips: Optional, but they add a fantastic twist! Use about 1 cup.
- Chopped Nuts: Pecans or walnuts work best; around 1 cup adds a delicious crunch.
- Coconut Flakes: 1-1.5 cups of sweetened shredded coconut offers texture and flavor.
- Turkey Bacon or Suggested Substitutes: A creative twist to replace any meat craving, finely chopped if that’s your style.
You can find most of these ingredients at your local grocery store or on platforms like Amazon. Ready to indulge? Let’s mix these layers and transform them into a dessert that indeed feels magical!
Step-by-step preparation of 7 Layer Bars
Making 7 layer bars, often called magic cookie bars, is simpler than you might think! With just a few ingredients and some easy-to-follow steps, you can create a delicious dessert that is sure to impress your friends and family. Let’s get started!
Prepare the baking pan
Begin by preheating your oven to 350°F (175°C). This is the ideal temperature for getting that perfect bake. While the oven warms up, grab a 9×13-inch baking pan and prepare it for the magic. You’ll want to line the bottom of the pan with parchment paper, leaving some overhang on the sides for easy removal later on. If you don’t have parchment paper, no worries; just lightly grease the pan with cooking spray or butter.
Create the graham cracker crust
Next up is the crunchy base of our 7 layer bars. You’ll need about 1 ½ cups of graham cracker crumbs. If you have whole graham crackers, simply crush them in a food processor or place them in a zip-top bag and use a rolling pin. Combine the crumbs with ½ cup of melted butter and ¼ cup of granulated sugar in a mixing bowl. Mix until combined, and then press this mixture firmly into the bottom of your prepared pan. This is your graham cracker crust, providing a delightful crunch that contrasts perfectly with the creamy layers above.
Layer the chocolate and butterscotch chips
Now it’s time for the fun part—layering! Sprinkle about 1 cup each of chocolate chips and butterscotch chips evenly over the crust. You can use semi-sweet chocolate chips or even dark chocolate if you’re feeling adventurous. The combination of these two types will create a delicious flavor profile that balances sweetness and richness. Don’t skimp on this step; the more evenly you distribute the chips, the more chocolaty goodness you’ll get in every bite.
Add the nuts and coconut
For those who enjoy a little texture, this step is crucial. Take about 1 cup of chopped nuts—walnuts or pecans work great—and sprinkle them over the layers. Next, add 1 ½ cups of shredded coconut on top. If you prefer unsweetened coconut to keep things less sugary, it’s a fantastic option too. The nuts will add that nice crunch, while the coconut introduces a hint of tropical flavor that complements the richness of the chips.
Pour the sweetened condensed milk
Here’s where the magic really happens. Grab a can of sweetened condensed milk (about 14 ounces) and pour it evenly over the entire layered masterpiece. The milk will seep into the layers as it bakes, binding everything together and resulting in those gooey, heavenly 7 layer bars we all love. As you pour, be sure to cover all areas, so no dry spots are left behind—this ensures each bar is just as delicious as the last.
Bake and cool the bars
Pop your baking pan into the preheated oven and bake for approximately 25-30 minutes, or until the top is golden brown and a bit bubbly. It’s essential to let the bars cool in the pan once out of the oven; they need time to set. Allow them to rest for about 1-2 hours at room temperature. After that, lift the bars out using the parchment paper overhang and place them on a cutting board. Cut into squares or rectangles as desired.
To make the most of your 7 layer bars, serve them warm, or store them in an airtight container for up to a week. Just try not to eat them all at once! These bars are perfect for parties, potlucks, or even a cozy movie night at home. If you’re interested in exploring more creative desserts, check out this article on no-bake desserts for ideas!
Variations on 7 Layer Bars
If 7 layer bars aren’t already a staple in your dessert rotation, you might find yourself experimenting with these delicious variations. Each twist brings something unique, making them perfect for any occasion or craving.
Dark Chocolate 7 Layer Bars
Who can resist the deep, rich flavor of dark chocolate? To switch up your traditional recipe, substitute semi-sweet chocolate chips with dark chocolate ones. This not only enhances the indulgence but also ups the antioxidant game. For a truly luxurious experience, consider a sprinkle of sea salt on top. It creates a beautiful contrast and elevates the overall flavor. You can find an excellent selection of dark chocolate chips at specialty stores or even explore local options at Check It on grocery sites.
Nut-Free 7 Layer Bars
Are nuts a concern for you or your guests? Not a problem! Simply replace them with crushed graham crackers or even crushed pretzels for a salty twist. This addition will give your 7 layer bars a delightful crunch while keeping them allergen-friendly. Additionally, you can add a layer of dried fruits like cranberries or cherries for added sweetness and chewy texture—perfect for those who miss that nutty delight.
Vegan 7 Layer Bars
Going vegan? You can easily modify this classic recipe! Use coconut milk instead of condensed milk, and opt for vegan butter in the crust. Dark chocolate chips or dairy-free chocolate chips can be subbed for the regular ones, making these 7 layer bars a vegan treat everyone can enjoy. With such simple adjustments, you’ll be enjoying these rich layers in no time!
These variations are just the beginning! Your creativity is truly the limit—experiment with flavors, toppings, or even textures. What variation are you most excited to try?
Cooking tips and notes for 7 Layer Bars
Creating 7 layer bars is like crafting a delicious masterpiece, and there are a few tips to make this no-bake treat shine even brighter!
Choosing Your Ingredients
Start with high-quality ingredients, as they play a pivotal role in flavor. Use fresh coconut, premium chocolate chips, and unsalted butter for the best results. Consider ways to elevate your 7 layer bars by experimenting with different nuts, like pecans or walnuts, to add a unique crunch.
Layering Tips
When layering your ingredients, think about texture and flavor balance. Start with graham cracker crumbs, followed by even layers of the other ingredients. This approach ensures that every bite has a mix of flavors. If you’re feeling adventurous, try adding a drizzle of caramel sauce just before baking to enhance the sweetness.
Baking and Storage
Keep a close eye on the baking time; you want that golden-brown top without overcooking. Once baked, let it cool completely before slicing. Store your 7 layer bars in an airtight container at room temperature for up to a week, but trust me, they won’t last that long!
For more baking tips, check out the Joy of Baking or BBC Good Food, which offer a treasure trove of inspiration. Enjoy crafting your 7 layer bars!
Serving Suggestions for 7 Layer Bars
When it comes to serving 7 layer bars, presentation matters as much as flavor! Here are some delightful ways to serve these scrumptious treats that will impress your friends and family.
Pair with a Warm Beverage
Imagine biting into a rich, gooey 7 layer bar while sipping on a piping hot cup of coffee or tea. The warmth of your drink perfectly complements the layers of chocolate and coconut. Consider offering:
- Coffee: A latte or mocha pairs wonderfully.
- Herbal Tea: Try a refreshing peppermint or a calming chamomile.
Creative Plate Presentation
To elevate your serving game, opt for a simple yet stylish plate presentation. Cut your bars into bite-sized squares and serve them on:
- A colorful platter with fresh fruit accompaniments like berries.
- Individual dessert cups garnished with a sprig of mint.
Sweet Additions for Every Occasion
For gatherings, consider adding a few more sweet treats to the table:
- Chocolate Dipped Fruit: These are quick and easy, offering a nice contrast.
- Ice Cream: Vanilla or coconut ice cream works beautifully as a side.
Don’t forget to check out this guide on dessert pairing for more ideas! You can also explore creative serving options on this entertaining website.
With these suggestions, your 7 layer bars will shine at any event, making dessert time not just a meal, but a memorable experience!
Time breakdown for 7 Layer Bars
Preparation time
Making 7 layer bars is simpler than it might seem. The preparation usually takes around 15 minutes. This includes gathering your ingredients like graham cracker crumbs, chocolate chips, and coconut flakes, and layering them in a baking dish. It’s a quick, hands-on process that gives you a delightful treat at the end!
Baking time
Once you’re set with the layers, pop them in the oven. The baking time is typically 25 to 30 minutes. This is when the magic happens—watch as the layers meld together, tantalizing your senses with that aromatic sweet scent wafting through your kitchen.
Total time
In total, you’re looking at about 40 to 45 minutes from start to finish to enjoy your delicious 7 layer bars. Perfect for a spontaneous dessert or an easy addition to your weekend baking plans!
For more insights on quick desserts, check out these 10-minute treats. They’re a game changer for busy professionals like you!
Nutritional Facts for 7 Layer Bars
When you’re whipping up a batch of 7 layer bars, it’s good to know what you’re indulging in! Here’s a quick glance at the nutritional facts to help guide your sweet cravings.
Calories
Each delicious bar typically contains around 220 calories. This makes them somewhat of a decadent treat (read: not something to munch on every day, but perfect for that special dessert moment).
Protein
With approximately 2-3 grams of protein per bar, 7 layer bars won’t do much to fill your protein needs, but they’ll definitely satisfy your sweet tooth. If you’re looking for protein-packed desserts, you might want to explore options with Greek yogurt or nuts.
Sodium
These bars are relatively low in sodium, with around 50-60 mg per serving. This is a nice treat without the excess salt, but if you’re watching your sodium intake, keep this in mind as you enjoy your treats.
For more detailed nutritional data, you can explore sources like the USDA FoodData Central or check out health blogs that dive into recipes and their health aspects. What’s your favorite way to enjoy these tasty treats?
FAQs about 7 Layer Bars
Can I make 7 Layer Bars ahead of time?
Absolutely! In fact, making 7 layer bars ahead of time can enhance their flavor as the layers meld together beautifully. Bake your bars, let them cool completely, and then cover them tightly with plastic wrap or aluminum foil. You can store them at room temperature for up to three days or refrigerate them for about a week. Just remember to bring them back to room temperature before serving for the best taste!
What can I substitute for the sweetened condensed milk?
If you’re looking for an alternative to sweetened condensed milk in your 7 layer bars, consider these options:
- Coconut Cream: Blend coconut cream with a bit of sugar to achieve a sweet, creamy texture.
- Cashew Cream: Soak cashews in water and blend until smooth with a touch of maple syrup for sweetness.
- Homemade Condensed Milk: You can also make your own by simmering milk and sugar until thickened.
These substitutes not only enhance the flavor but can also accommodate dietary preferences. Interested in more substitutions? Check out this guide on recipe substitutions.
How do I store leftover 7 Layer Bars?
Storing your leftovers is simple. Cut your 7 layer bars into squares and place them in an airtight container. If you want to keep them fresh longer, you might want to layer parchment paper between squares to prevent sticking. These bars can last up to two weeks in the refrigerator, or you can freeze them for up to three months. Just remember to thaw them in the fridge when you’re ready for a sweet treat!
By answering these common questions, I hope you can confidently whip up your own batch of 7 layer bars that will impress your friends and family!
Conclusion on 7 Layer Bars
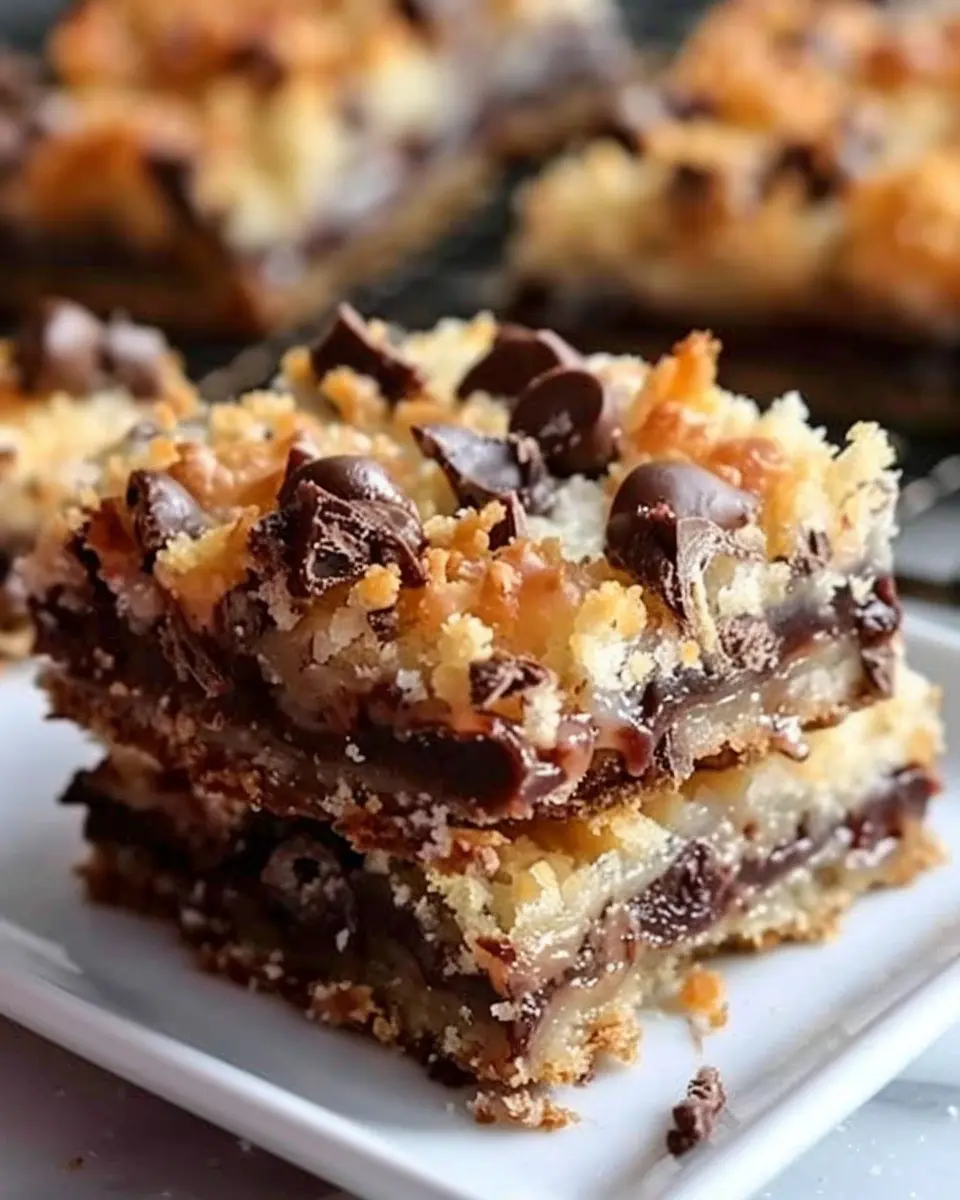
In wrapping up our exploration of the delightful 7 layer bars, it’s clear that these magic cookie bars are more than just a dessert; they’re a delightful experience! Their combination of textures—from the chewy coconut to the creamy chocolate—creates a sweet symphony that is hard to resist.
Whether you’re whipping them up for a gathering or indulging with a quiet cup of coffee, these treats promise to satisfy your sweet cravings. Plus, their simplicity means you can easily customize them with your favorite nuts or add a splash of caramel.
Give these bars a try and let your taste buds sing! For more delectable dessert ideas, you might enjoy exploring other cookie recipes or finding tips on how to perfect your baking skills. Happy baking!
Print7 Layer Bars: Easy Magic Cookie Bars You’ll Love to Make
These 7 Layer Bars, also known as Magic Cookie Bars, are a delicious treat that combines multiple layers of flavors and textures, making them a favorite for gatherings and special occasions.
- Prep Time: 15 minutes
- Cook Time: 30 minutes
- Total Time: 45 minutes
- Yield: 24 bars 1x
- Category: Dessert
- Method: Baking
- Cuisine: American
Ingredients
- 1 cup graham cracker crumbs
- 1/2 cup unsalted butter, melted
- 1 cup sweetened shredded coconut
- 1 cup chocolate chips
- 1 cup butterscotch chips
- 1 can (15 oz) sweetened condensed milk
- 1 cup chopped nuts (walnuts or pecans)
Instructions
- Preheat the oven to 350°F (175°C).
- In a medium bowl, combine graham cracker crumbs and melted butter. Press this mixture into the bottom of a greased 9×13 inch baking dish.
- Layer the shredded coconut evenly over the crust.
- Evenly sprinkle chocolate chips and butterscotch chips on top of the coconut.
- Pour the sweetened condensed milk evenly over the top to cover all the layers.
- Sprinkle chopped nuts on top.
- Bake in the preheated oven for about 25-30 minutes, or until lightly browned.
- Allow to cool before cutting into bars.
Notes
- Feel free to customize the layers with your favorite ingredients!
- These bars can be made ahead of time and stored for later enjoyment.
Nutrition
- Serving Size: 1 bar
- Calories: 180
- Sugar: 14g
- Sodium: 70mg
- Fat: 9g
- Saturated Fat: 6g
- Unsaturated Fat: 2g
- Trans Fat: 0g
- Carbohydrates: 25g
- Fiber: 1g
- Protein: 2g
- Cholesterol: 15mg
Keywords: 7 Layer Bars, Magic Cookie Bars, dessert, easy dessert, layered bars