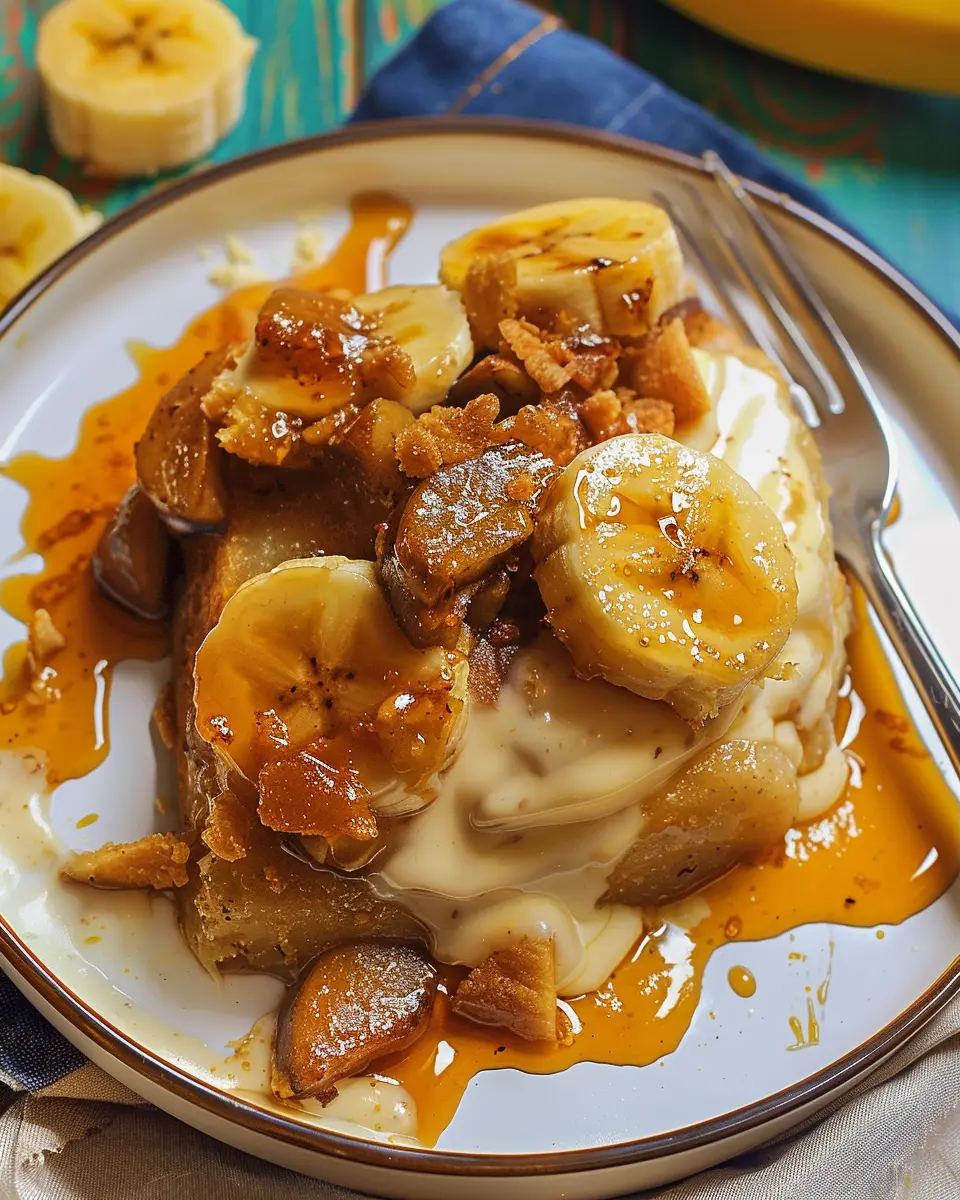
Introduction to Grandma’s Apple Crisp
There’s something undeniably special about Grandma’s Apple Crisp that makes it a beloved dessert across generations. Why does this classic dish continue to capture hearts, you ask? Maybe it’s the perfectly balanced combination of sweet, tart apples and a buttery, crunchy topping that creates a comforting symphony of flavors. Or perhaps it’s the nostalgia associated with family gatherings, where the aroma of cinnamon and baked apples wafts through the air, sparking fond memories of laughter and warmth.
What truly sets Grandma’s Apple Crisp apart is its simplicity. You don’t need to be a gourmet chef to whip up this delightful dessert. With just a handful of ingredients—apples, sugar, oats, flour, and butter—anyone can create a dish that feels like a warm hug on a chilly evening. You might wonder about the best types of apples to use. According to the experts at Food Network, Granny Smith and Honeycrisp are top choices for their balance of sweetness and tartness.
Not only is Grandma’s Apple Crisp irresistibly delicious, but it also boasts health benefits. Apples are high in fiber and vitamins, making this dessert not just a guilty pleasure but also a way to sneak in some nutritional goodness. Plus, it’s a fantastic way to use up those apples you may have picked—or purchased in abundance at a fall festival!
And let’s not forget the flexibility of this dish. Whether you enjoy it warm with a scoop of vanilla ice cream or prefer it served with a dollop of whipped cream, the choice is yours! You can also swap toppings, experimenting with nuts or oats for added texture.
The beauty of Grandma’s Apple Crisp lies in its versatility and nostalgia, making it perfect for casual weeknight dinners or special occasions. So, grab your apron and let’s dive into this timeless favorite!
Ingredients for Grandma’s Apple Crisp
When it comes to comfort food, Grandma’s Apple Crisp reigns supreme. This delicious dessert is not just about the taste; it’s about the memories and warmth that fill your kitchen as it bakes. Here’s what you’ll need to whip up this classic treat:
Apples
- 6 large apples, peeled, cored, and sliced (Granny Smith or Honeycrisp are great choices for a perfect balance of sweet and tart)
Sugar & Spices
- 1 cup granulated sugar
- 1 teaspoon ground cinnamon
- 1/2 teaspoon ground nutmeg (optional, for that extra warmth)
Crisp Topping
- 1 cup rolled oats
- 1 cup all-purpose flour
- 1/2 cup packed brown sugar
- 1/2 cup unsalted butter, melted (you can substitute with coconut oil for a dairy-free option)
A Splash of Flavor
- 1/2 cup chopped nuts (like walnuts or pecans, if desired)
- 1 teaspoon vanilla extract
With these simple ingredients, you can create a dessert that not only satisfies your sweet tooth but also brings a smile to your face. Want more recipe inspiration? Check out this guide on how to choose the best apples for baking!
Step-by-Step Preparation of Grandma’s Apple Crisp
Making Grandma’s Apple Crisp is like wrapping yourself in a warm blanket on a chilly day. This comforting dessert is perfect for gatherings, and who wouldn’t want a little slice of nostalgia? Let’s take you through the preparation process step-by-step, ensuring a delightful experience in the kitchen.
Gather Your Ingredients
To whip up Grandma’s Apple Crisp, you’ll need a mix of fresh ingredients that come together to create the perfect harmony of flavors. Here’s what you should gather:
- Apples: 6-8 medium-sized (like Granny Smith or Honeycrisp for that lovely tartness)
- Sugar: 3/4 cup for the filling and extra for the crumb topping
- Cinnamon: 1 teaspoon for a warm spice note
- Lemon Juice: 1 tablespoon helps to brighten the apples
- Old-Fashioned Oats: 1 cup for the crumbly topping
- Flour: 1/2 cup, all-purpose works wonders here
- Brown Sugar: 1 cup for that rich sweetness
- Butter: 1/2 cup (1 stick), softened for a perfect texture
It’s always better to use fresh ingredients. Not only do they taste better, but they also make your kitchen smell divine! If you need some advice on sourcing apples, explore tips from the Apple Association.
Prepare the Baking Dish
Before you dive into mixing, take a moment to preheat your oven to 350°F (175°C). While that’s warming up, grab an 8×8-inch baking dish (or similar). To ensure the apple crisp doesn’t stick, lightly butter the dish or spray it with non-stick cooking spray. This step seems minor, but trust me, you want that crisp to slide out easily!
Mix the Dry Ingredients
In a large mixing bowl, add your oats, flour, sugar, brown sugar, and cinnamon. Stir them together until evenly combined. This simple mixture will form the crumbly topping that adds the perfect crunch to the dish. Plus, the smell of cinnamon is simply irresistible!
Layer the Apples
Peel, core, and slice your apples into thin wedges. The thinner the slices, the better they meld together in the baking process. As you slice, toss them in a bowl with lemon juice and sugar to prevent browning and enhance their natural sweetness. Here’s the trick: layer the apples evenly in your prepared baking dish. Try to pack them snugly to create a hearty bottom layer.
Combine Wet Ingredients and Pour Over Apples
In another bowl, whisk together any leftover sugar and a tablespoon of lemon juice. Pour this mixture evenly over the layered apples. This action infuses sweetness and tang, harmonizing the flavors beautifully.
Add the Crumbly Topping
Now it’s time for the star of the show—your crumbly topping! Sprinkle it generously over the apples. You want a nice, even layer, so don’t be shy, get in there and spread it out! The combination of oats and butter will create an amazing crust when baked.
Bake to Perfection
Slide your dish into the preheated oven and let it bake for about 40-45 minutes, or until the topping is golden brown and the apples are bubbling underneath. The aroma that fills your kitchen will make you feel like a kid again, waiting for dessert after a home-cooked meal.
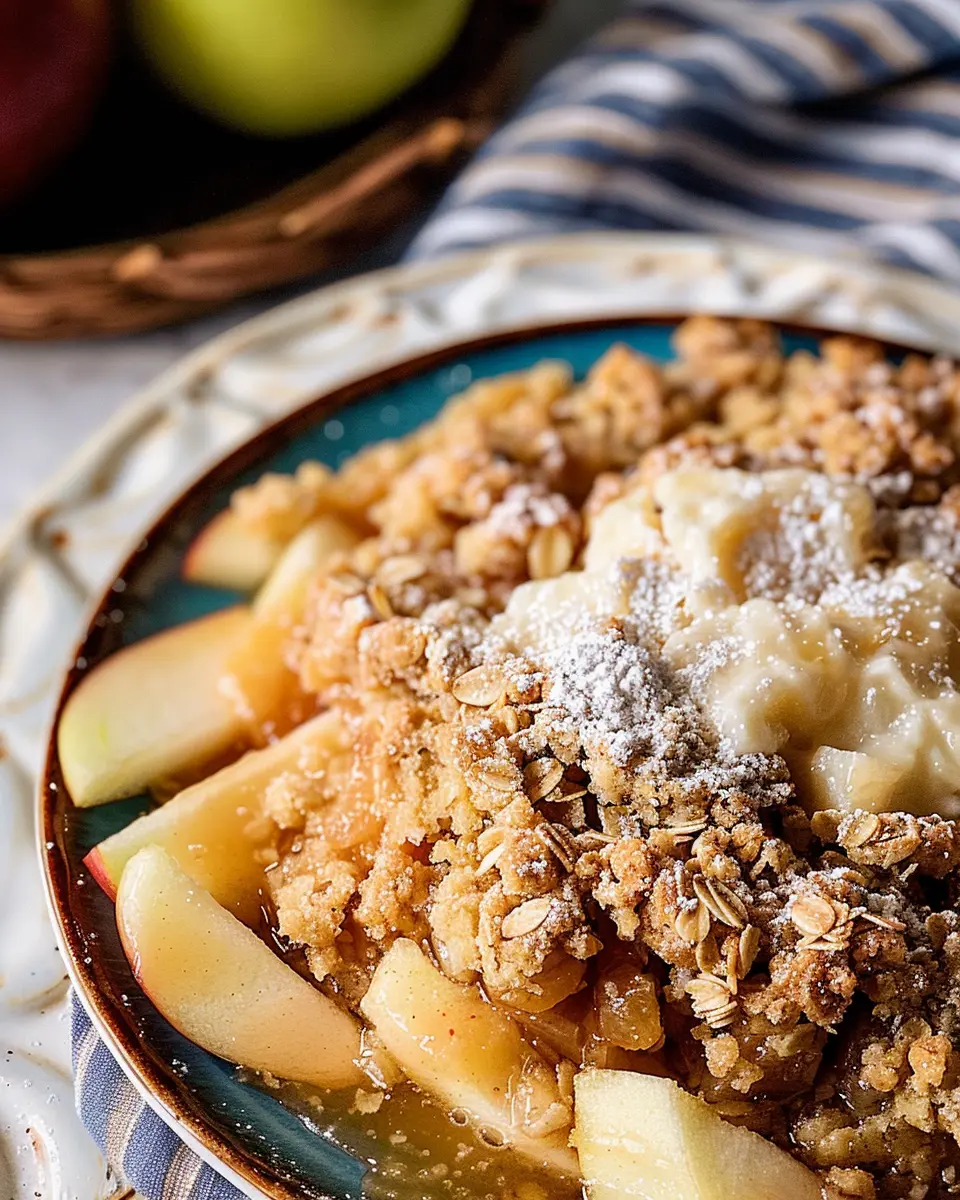
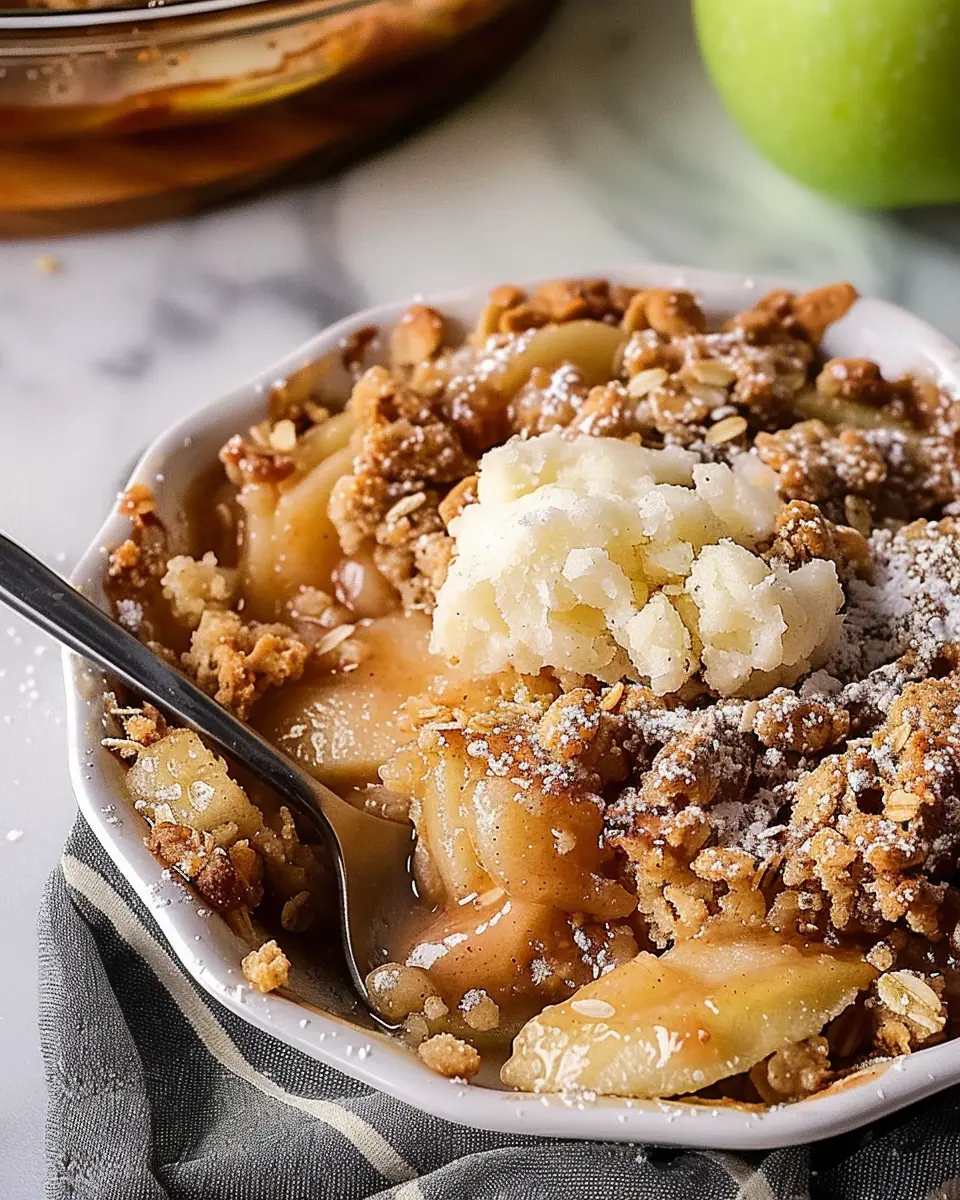
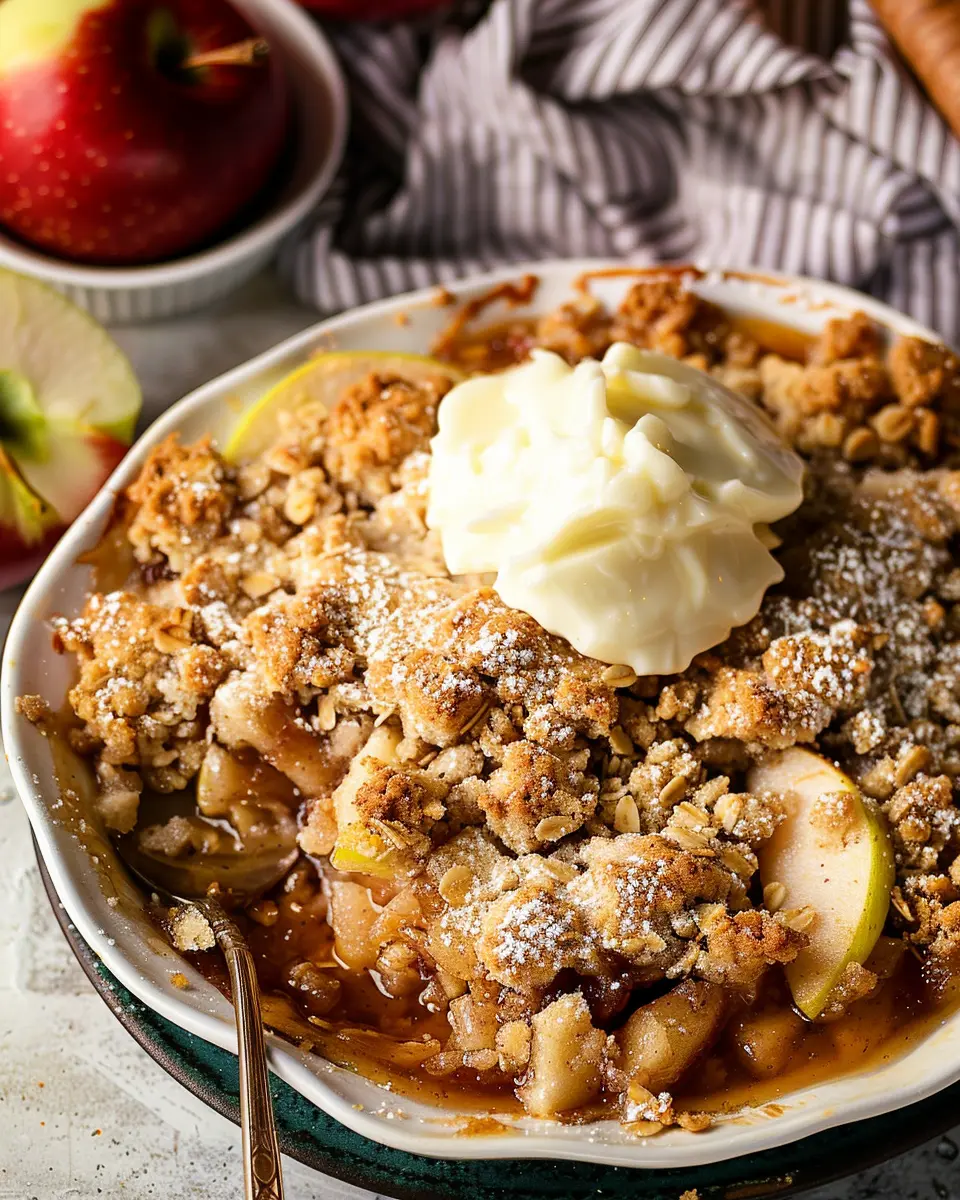
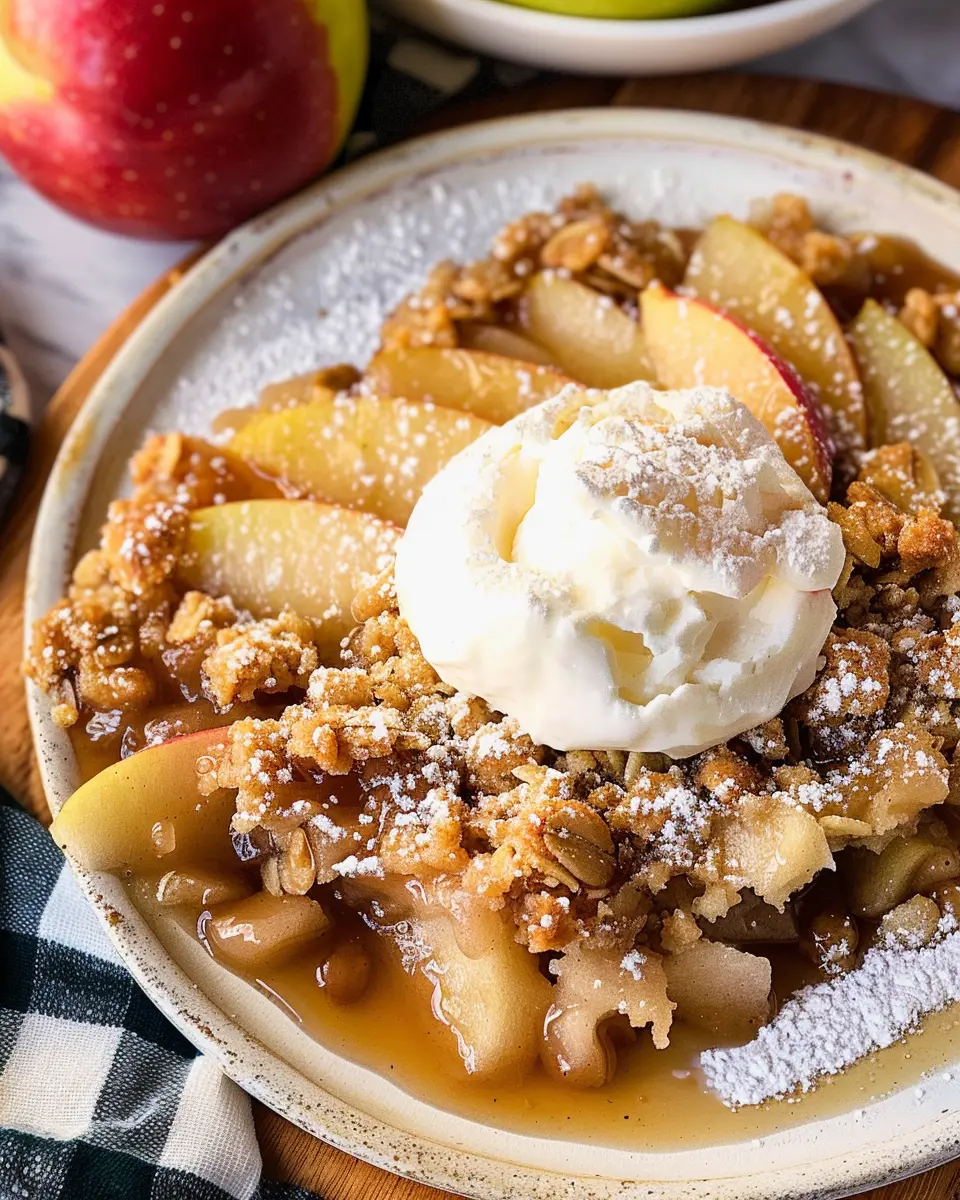
Once it’s out of the oven, let it rest for a few minutes before serving. This Grandma’s Apple Crisp can be enjoyed warm, ideally topped with a scoop of vanilla ice cream or a dollop of whipped cream for that extra indulgence.
In the end, making Grandma’s Apple Crisp isn’t just about savoring a delicious dessert; it’s an experience that brings people together. So, gather your ingredients, roll up your sleeves, and enjoy every step of the process!
Variations of Grandma’s Apple Crisp
Grandma’s Apple Crisp is a beloved classic, but the beauty of this dish lies in its flexibility! Here, we explore some delightful variations that can make your apple crisp experience truly unique.
Gluten-free version
For those with gluten sensitivities, you can easily transform Grandma’s Apple Crisp into a gluten-free delight. Instead of traditional flour, try using almond flour or oat flour. Both options keep that delightful crumbly topping while ensuring everyone can enjoy this comforting dish. Look for gluten-free oats, if you’re adding oats, to maintain that hearty texture.
Adding nuts or oats for extra crunch
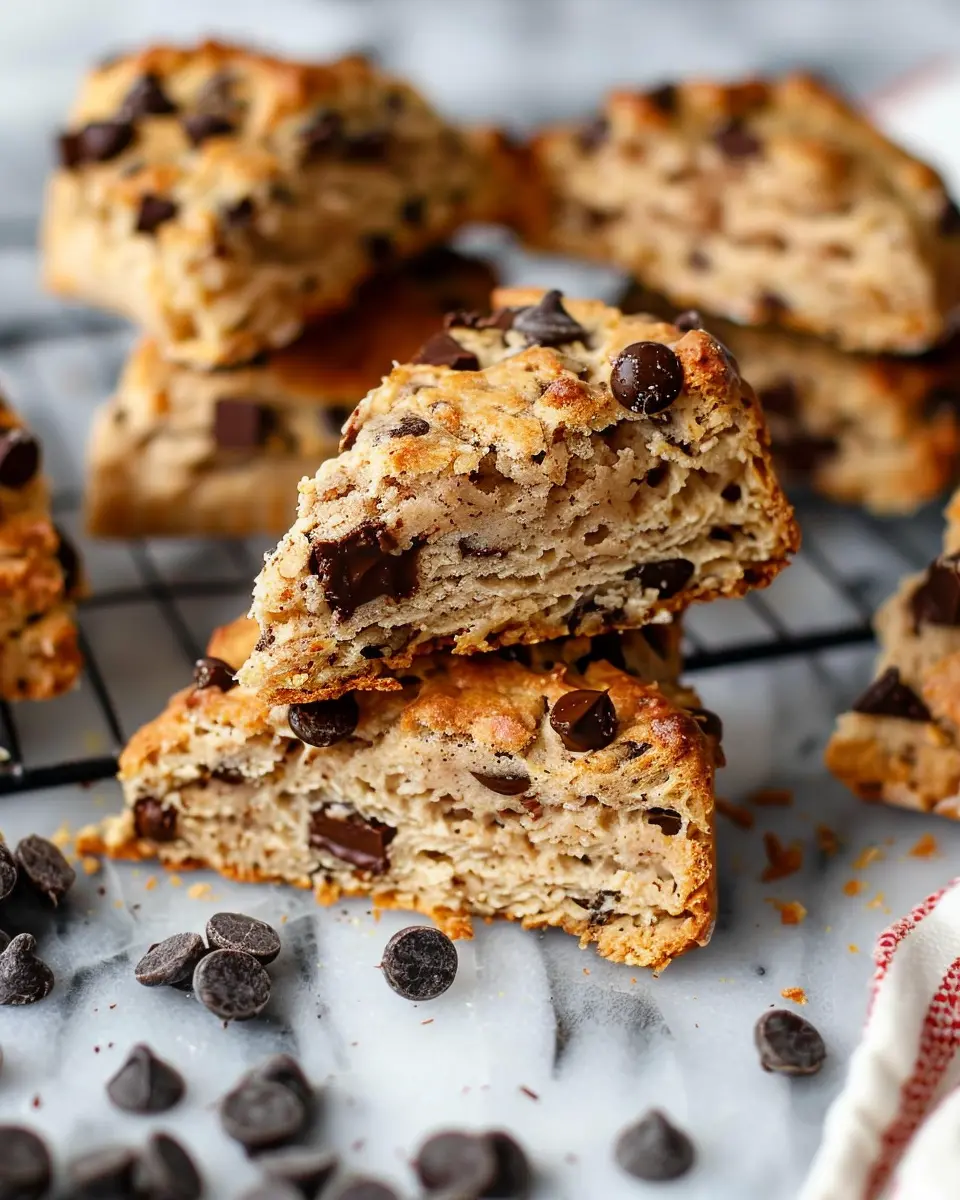
Want to elevate the crunch factor of your apple crisp? Incorporate some chopped walnuts, pecans, or slivered almonds right into the topping! Not only do they add a wonderful flavor, but they also boost the dish’s nutritional value. If you prefer a heartier touch, toss in rolled oats. This addition brings a rustic charm and complements the apples beautifully. Did you know that adding even a small handful of nuts can increase your dish’s protein content?
Spicing it up with different apple varieties
The type of apples you choose can dramatically change the taste of your Grandma’s Apple Crisp. Try using a mix of tart apples, like Granny Smith, combined with sweeter varieties such as Fuji or Honeycrisp. This blend will create a complex flavor profile, keeping each bite exciting. According to the Apple Association, there are over 7,500 apple varieties available! Don’t be shy to experiment; after all, cooking is all about expressing your tastes.
Try out these variations and let your Grandma’s Apple Crisp recipe shine in new ways! For more tips and recipes, you might enjoy checking out National Apples for all things apple-related.
Cooking Tips and Notes for Grandma’s Apple Crisp
When making Grandma’s Apple Crisp, choosing the right apples makes a world of difference. Fresh apples, like Granny Smith or Honeycrisp, bring vibrant flavor and the perfect balance of tartness and sweetness. If you’re using frozen apples, make sure to thaw and drain excess moisture to prevent a soggy filling. You want that delightful contrast with the crispy topping!
Now, let’s talk about that crave-worthy crunchy topping. A mix of oats, brown sugar, and cold butter is key; don’t skip the butter! Mixing with your hands until crumbly ensures everything bakes to a delightful crisp. For an extra crunch, consider adding chopped nuts or a sprinkle of cinnamon to the topping. Remember, the topping should be golden brown and delightful, almost inviting you to dive right in!
For more on choosing the best apple varieties, check out this great resource on apple types. Happy baking!
Serving Suggestions for Grandma’s Apple Crisp
Pairing with Ice Cream or Whipped Cream
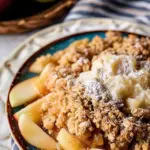
When it comes to enjoying Grandma’s Apple Crisp, you simply can’t go wrong by adding a scoop of vanilla ice cream or a dollop of whipped cream. The rich creaminess complements the warm, spiced apples beautifully, creating a delightful contrast in texture and temperature. If you want to elevate this classic dessert, consider trying flavored ice creams like caramel or cinnamon for added depth.
Serving it Warm Versus Cold
Serving Grandma’s Apple Crisp warm enhances its aromatic spices, filling your home with a cozy ambiance that’s hard to resist. Warm apple crisp with a scoop of melting ice cream is a comfort food experience like no other. However, if you have leftovers, don’t shy away from enjoying it cold the next day. Cold apple crisp can be surprisingly refreshing, making it a versatile treat for any occasion.
Remember, there are no hard rules—experiment and find your perfect way to enjoy this delicious dish! If you’re curious about more serving ideas or variations, check out this guide on creative toppings and pairings!
Time Breakdown for Grandma’s Apple Crisp
Preparation Time
Making Grandma’s Apple Crisp is a delightful experience, and it shouldn’t take too long! You’ll want to set aside about 15-20 minutes for preparation. This includes peeling and slicing the apples, mixing the oats and spices, and getting everything ready for baking. Don’t forget to taste the apple mixture—it’s one of the best parts!
Cooking Time
Once everything is prepped, pop the dish into the oven. The cooking time generally ranges from 30 to 35 minutes at 350°F. This is when the magic happens—the aromas will fill your kitchen, making it hard to resist sneaking a taste!
Total Time
In total, you’ll be looking at about 50-55 minutes from start to finish. This makes Grandma’s Apple Crisp perfect for a cozy weeknight dessert or a sweet addition to your weekend gatherings. And trust me, these moments spent in the kitchen will be cherished. For more tips on timing and technique, check out local cooking resources or gatherings that celebrate traditional recipes.
Nutritional Facts for Grandma’s Apple Crisp
Calories
Grandma’s Apple Crisp is a delightful treat, packing around 200 calories per serving. It’s a sweet indulgence that can fit into your dessert plans without derailing your healthy lifestyle.
Carbohydrates
This classic dessert contains approximately 30 grams of carbohydrates, primarily from the sweet, juicy apples and the crispy oat topping. While carbs are essential for energy, be mindful of portion sizes to keep things balanced.
Sugar Content
With about 10 grams of sugar per serving, Grandma’s Apple Crisp offers a satisfying sweetness without going overboard. The natural sugars from the apples complement the added sugars, providing a taste that feels indulgent yet remains wholesome. For more insights on managing sugar intake, check out this helpful guide from Healthline.
Feel free to customize this recipe with a sprinkle of cinnamon or nutmeg for added flavor while keeping nutrition in mind! Remember, enjoying dessert is all about moderation. For additional tips on healthy dessert options, see this article.
FAQ about Grandma’s Apple Crisp
Can I use other fruits in the crisp?
Absolutely! While Grandma’s Apple Crisp recipe shines with tart apples, feel free to mix in other fruits. Berries like blueberries or raspberries add a vibrant twist, while peaches or pears can provide a lovely, juicy contrast. Just keep in mind that if you use juicier fruits, you might want to adjust the sugar and cooking time to prevent sogginess. Want to experiment? Check out this fruit pairing guide for inspiration!
How can I store leftovers?
Storing leftovers is a breeze! Simply cover your apple crisp with plastic wrap or transfer it to an airtight container. It can stay fresh in the refrigerator for up to 3-4 days. If you think you won’t finish it in that time, you can freeze it. Just ensure it’s fully cooled before placing it in a freezer-safe container. It should last up to 3 months in the freezer—perfect for those cozy nights when you need a sweet treat.
What’s the best way to reheat apple crisp?
Reheating your Grandma’s Apple Crisp can bring back that warm, comforting experience! For the best results, pop individual servings in the microwave for about 30-45 seconds. If you prefer a crisp topping, consider using the oven. Preheat it to 350°F (175°C) and reheat for about 10-15 minutes. Just cover it loosely with aluminum foil to prevent over-browning. And remember, you can always serve it with a scoop of vanilla ice cream for an extra treat!
For more tips on warming up baked goods, visit this baking advice page.
Conclusion on Grandma’s Apple Crisp
When it comes to comforting desserts, Grandma’s Apple Crisp truly stands out. This delightful dish combines the tartness of fresh apples with a rich, buttery topping that packs a satisfying crunch. It’s simple to make and requires minimal ingredients—perfect for both seasoned bakers and kitchen novices alike.
Not only does this dessert evoke nostalgia, reminding us of cozy family gatherings, but it also offers a balance of flavor and texture that keeps everyone coming back for more. So why not bring a slice of happiness to your next gathering? Give Grandma’s Apple Crisp a try; you won’t regret it!
For more baking inspiration, check out King Arthur Baking and discover a treasure trove of dessert recipes.
PrintGrandma’s Apple Crisp: Easy Comfort Food for Family Gatherings
Enjoy a cozy dessert with Grandma’s Apple Crisp, perfect for family gatherings.
- Prep Time: 15 minutes
- Cook Time: 40 minutes
- Total Time: 55 minutes
- Yield: 8 servings 1x
- Category: Dessert
- Method: Baking
- Cuisine: American
- Diet: Vegetarian
Ingredients
- 6 cups sliced apples
- 1 cup oats
- 1/2 cup flour
- 1 cup brown sugar
- 1/2 cup butter, melted
- 1 teaspoon cinnamon
- 1/4 teaspoon nutmeg
Instructions
- Preheat the oven to 350°F (175°C).
- In a large bowl, toss the sliced apples with cinnamon and nutmeg.
- In another bowl, mix oats, flour, brown sugar, and melted butter until crumbly.
- Spread the apples in a greased baking dish, then sprinkle the oat mixture on top.
- Bake for 35-40 minutes until the apples are soft and the topping is golden brown.
Notes
- Serve warm with ice cream for added indulgence.
Nutrition
- Serving Size: 1 cup
- Calories: 250
- Sugar: 18g
- Sodium: 180mg
- Fat: 10g
- Saturated Fat: 6g
- Unsaturated Fat: 4g
- Trans Fat: 0g
- Carbohydrates: 38g
- Fiber: 3g
- Protein: 2g
- Cholesterol: 15mg
Keywords: Grandma’s Apple Crisp, apple dessert, easy dessert recipe, family gatherings, comfort food