Introduction to Easy Apple Crisp
The nostalgic charm of apple crisp
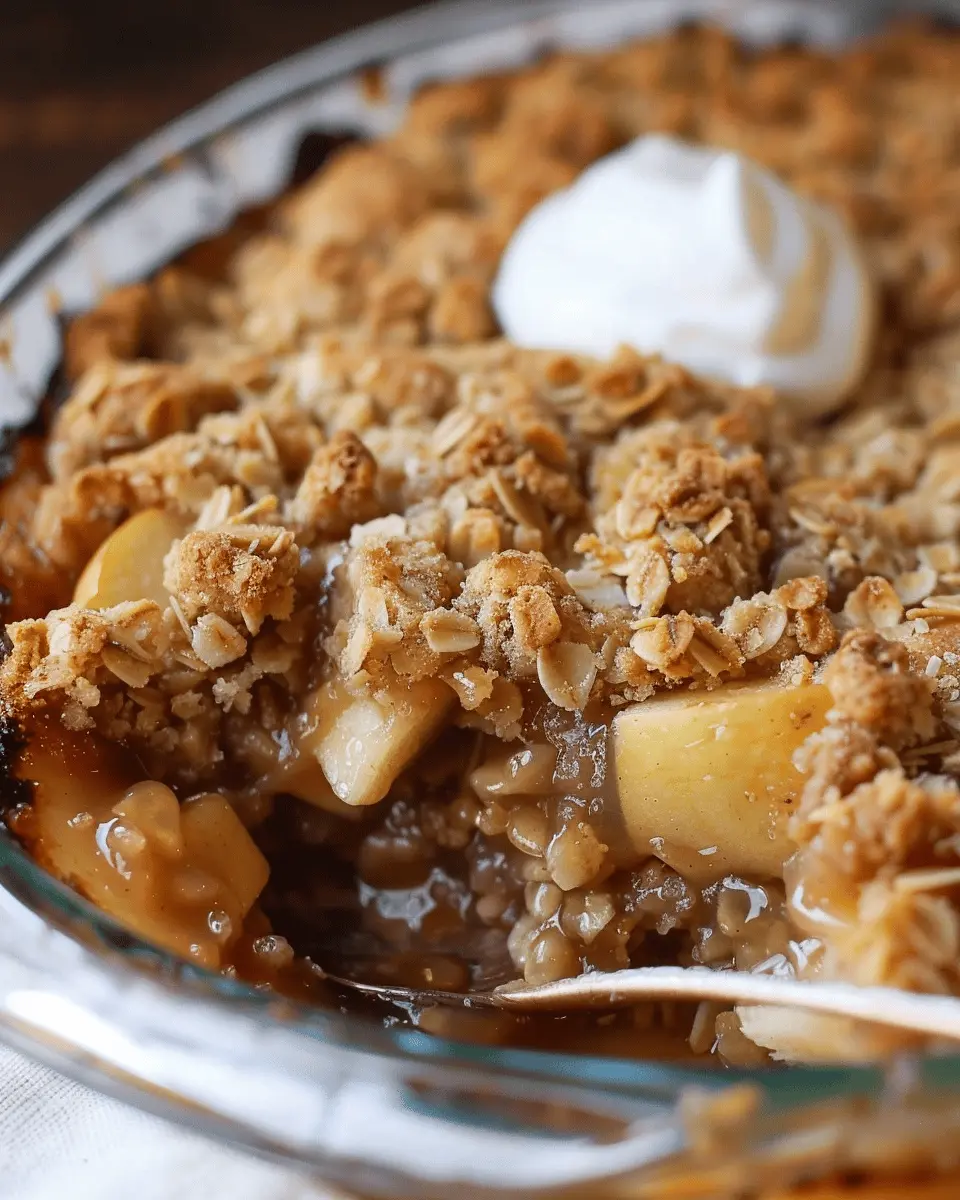
There’s something irresistibly comforting about apple crisp. Perhaps it’s the warm aroma wafting through your kitchen, or the sight of bubbling apples beneath a golden, buttery topping. This classic dessert is not merely a dish but a delightful experience that brings back memories of family gatherings and autumn afternoons. If you’ve ever looked forward to the first bite of a homemade apple crisp, you know that joyous feeling when crispy oat topping meets tender, spiced apples.
Remember those cozy evenings spent at Grandma’s house, where a hearty scoop of apple crisp topped with vanilla ice cream was the perfect ending to any meal? That nostalgia fuels the joy of recreating this dessert in your own kitchen. The simple act of slicing apples and mixing ingredients is a delightful way to unwind after a long day, making apple crisp a favorite among young professionals who appreciate both comfort food and the joy of cooking.
Why homemade apple crisp is a must-try
While store-bought versions are available, nothing beats the taste and satisfaction of making your own apple crisp. First off, you have complete control over the ingredients. You can choose organic apples, adjust the sweetness to your preference, and even enhance the flavor with your favorite spices. According to a study by the American Institute for Cancer Research, home-cooked meals are often healthier, benefiting both your palate and wellbeing.
Making apple crisp is also impressively easy. It requires just a handful of ingredients—apples, oats, butter, flour, and sugar—and can typically be prepared in under an hour. Imagine inviting friends over for dinner, and serving them a warm dish fresh from the oven, perhaps alongside some homemade whipped cream or a scoop of ice cream. They’ll be reminded of their own childhood nostalgia and appreciate the effort you’ve put into crafting a delicious dessert.
In addition to being incredibly tasty, apple crisp is versatile. You can mix in other fruits like berries or peaches for a unique twist, or experiment with different nuts and flavorings. With each batch, you create new memories and flavors that are distinctly yours. So why not gather those apples from your local farmer’s market, and dive into the delightful world of homemade apple crisp? It’s more than just a dessert—it’s an invitation to savor life’s sweet moments.
Ingredients for Easy Apple Crisp
Creating a delicious apple crisp is all about having the right ingredients. So, let’s break down what you’ll need.
Essential Ingredients for the Topping
The topping is what elevates your apple crisp to the next level. Here’s what you’ll need:
- Old-fashioned oats: These add that chewy texture we all adore.
- All-purpose flour: A must for binding the topping together.
- Brown sugar: Opt for light or dark, depending on your taste preference. It brings that delightful caramel flavor.
- Cinnamon: Just a teaspoon will warm up the whole dish with its comforting essence.
- Butter: Use unsalted for controlled seasoning (melted or softened).
- Salt: A pinch enhances all the sweet flavors.
Ingredients for the Apple Filling
Now onto the star of the show: the apple filling! For the best results, choose a mix of sweet and tart apple varieties like Granny Smith and Honeycrisp. Gather these ingredients:
- Apples: About 6 cups, peeled, cored, and sliced.
- Granulated sugar: Just a touch to sweeten the apples.
- Lemon juice: Freshly squeezed adds a lovely brightness.
- Nutmeg: A sprinkle for extra warmth and flavor.
So, gather your ingredients and get ready for a cozy evening of baking! For more tips on apple varieties, check out resources from The Apple Tree. Happy baking!
Preparing Easy Apple Crisp
If you’re looking for a comforting dessert that’s as simple to prepare as it is delicious, apple crisp is your answer! This classic dish combines sweet, juicy apples with a crunchy, buttery topping that leaves everyone coming back for seconds. Let’s dive into how to prepare it in five easy steps.
Preheat the oven and prepare the baking dish
Before we get into the nitty-gritty of mixing and baking, the first step is to preheat your oven to 350°F (175°C). Preheating ensures that the apple crisp cooks evenly and achieves that lovely golden-brown finish we all love.
While your oven is warming up, grab an 8×8 or 9×9-inch baking dish. Lightly grease it with butter or a cooking spray of your choice to prevent sticking. A non-stick dish is a lifesaver when it comes time to serve and enjoy!
Mix the topping ingredients
Now, it’s time to create that irresistible topping. In a large mixing bowl, combine the following ingredients:
- 1 cup of old-fashioned rolled oats
- 1/2 cup of all-purpose flour
- 1/2 cup of packed brown sugar
- 1/2 teaspoon of cinnamon
- 1/4 teaspoon of salt
- 1/2 cup of cold, unsalted butter, cut into small cubes
Using your fingertips, mix the ingredients together until the mixture resembles coarse crumbs. This step is crucial as it gives your apple crisp that delightful texture. If you prefer a slightly sweeter topping, you might consider adding a tablespoon of granulated sugar!
Combine the apple filling ingredients
While the topping is resting, let’s focus on the star of our dessert: the apples! For this recipe, you’ll want about 6 medium-sized apples. A mixture of tart and sweet apples, like Granny Smith and Honeycrisp, works wonders. Peel, core, and slice your apples, then toss them in a large bowl with:
- 1 tablespoon of lemon juice
- 1/4 cup of granulated sugar
- 2 teaspoons of cornstarch
- 1/2 teaspoon of cinnamon
The lemon juice adds brightness and helps prevent browning. The cornstarch will thicken the juices as the apples cook, creating a nice, syrupy filling to complement the crispy topping.
Assemble the apple crisp layers
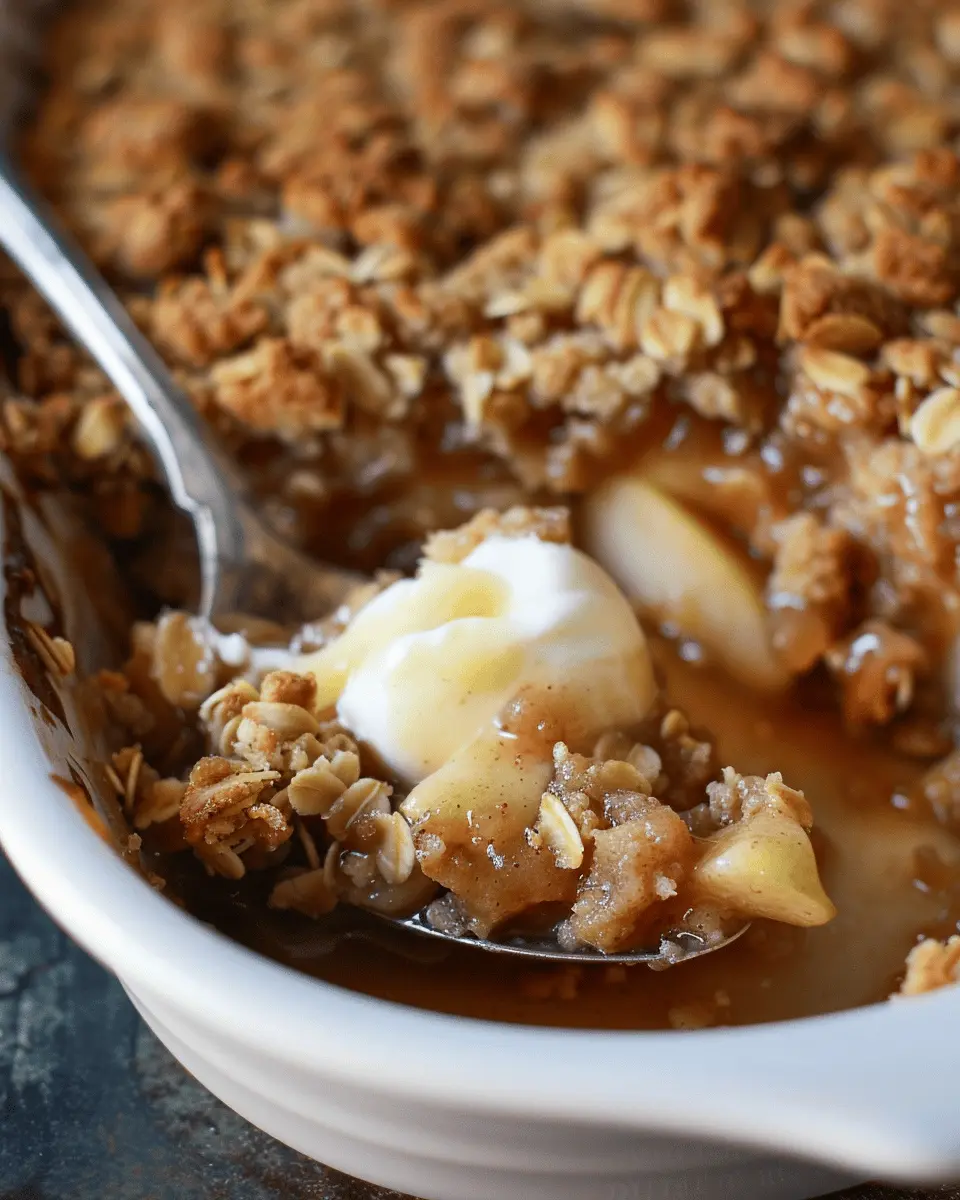
With your filling and topping ready, it’s time to layer them for the ultimate apple crisp. Start by evenly spreading the apple mixture into the prepared baking dish. Make sure the apples are distributed uniformly, so every bite is loaded with flavor. Next, sprinkle your oat topping generously over the apples, ensuring complete coverage.
This layering technique not only allows the flavors to meld beautifully during baking, but it also helps maintain that sought-after crunch on top!
Bake to perfection
Now for the moment we’ve all been waiting for—baking! Place your assembled apple crisp in the preheated oven and bake for about 30-40 minutes. You’ll know it’s ready when the apples are bubbling and the topping is golden brown. If you’re unsure, a toothpick inserted into the apples should come out tender.
Once baked, remove the dish from the oven and let your apple crisp cool for about 10-15 minutes. This cooling time makes serving easier, and trust me, the aromatic smell wafting through your kitchen will have everyone gathering around in anticipation.
And there you have it—easy steps to creating a mouthwatering apple crisp that will surely impress friends and family alike. Remember, this dessert pairs perfectly with a scoop of vanilla ice cream or a dollop of whipped cream. Enjoy your baking adventure, and let those flavors shine!

Variations on Easy Apple Crisp
Making apple crisp is as delightful as enjoying the finished product, and there are so many fun ways to switch it up! Here are a couple of variations that cater to different dietary needs and flavor cravings.
Gluten-Free Apple Crisp
If you’re seeking a gluten-free twist on classic apple crisp, worry not! This variation is simple and just as delicious.
- Ingredients: Replace all-purpose flour with almond flour or a gluten-free blend. They both work beautifully while adding a lovely nutty flavor.
- Oats: Ensure your oats are certified gluten-free, as some brands can be cross-contaminated during processing.
- Sweetener: Use maple syrup or agave instead of brown sugar for a hint of natural sweetness that complements the apples perfectly.
The right combination will help you savor every bite without compromising taste or texture. Plus, for some excellent gluten-free tips, check out the Gluten-Free Society.
Nutty Apple Crisp with Walnuts or Pecans
Want to add a delightful crunch to your apple crisp? Introducing nuts can elevate your dish significantly.
- Nuts of Choice: Incorporate either chopped walnuts or pecans into the topping. This not only adds crunch but also offers healthy fats that provide a lovely depth of flavor.
- Preparation: Simply mix the nuts into your crisp topping, or sprinkle them on top for a beautiful presentation just before baking.
- Flavor Boost: Pairing these nuts with spices like cinnamon or nutmeg can really enhance the overall taste.
This nutty addition will make your dessert feel more indulgent while being surprisingly easy to achieve. For inspiration on various toppings, consider browsing Healthy Seasonal Recipes.
By trying out these variations, you can enjoy apple crisp in delightful, new ways—perfect for any occasion!
Cooking Notes for Easy Apple Crisp
Tips for Selecting the Best Apples
Choosing the right apples is crucial for a delicious apple crisp. Look for varieties that balance sweetness and tartness, like Granny Smith, Honeycrisp, or Braeburn. These apples hold their shape well during baking and provide that perfect punch of flavor. If you’re unsure, visit your local farmer’s market or grocery store to ask for recommendations, as freshness can make a world of difference.
How to Prevent a Soggy Bottom
A soggy crust can be a major letdown. Here’s how to avoid that dreaded scenario:
- Pre-cook your apples: Briefly sautéing them with a bit of sugar and cinnamon can help draw out excess moisture.
- Use a thickener: Toss your sliced apples with a tablespoon of flour or cornstarch before layering them in your dish. This absorbs extra juices.
- Bake it right: Ensure your apple crisp bakes long enough until the top is golden brown and the filling is bubbling.
These simple steps will elevate your apple crisp and ensure a delightful texture! For more tips on baking and ingredient selection, check out Epicurious for expert advice.
Serving Suggestions for Easy Apple Crisp
Pairing with Ice Cream and Caramel Sauce
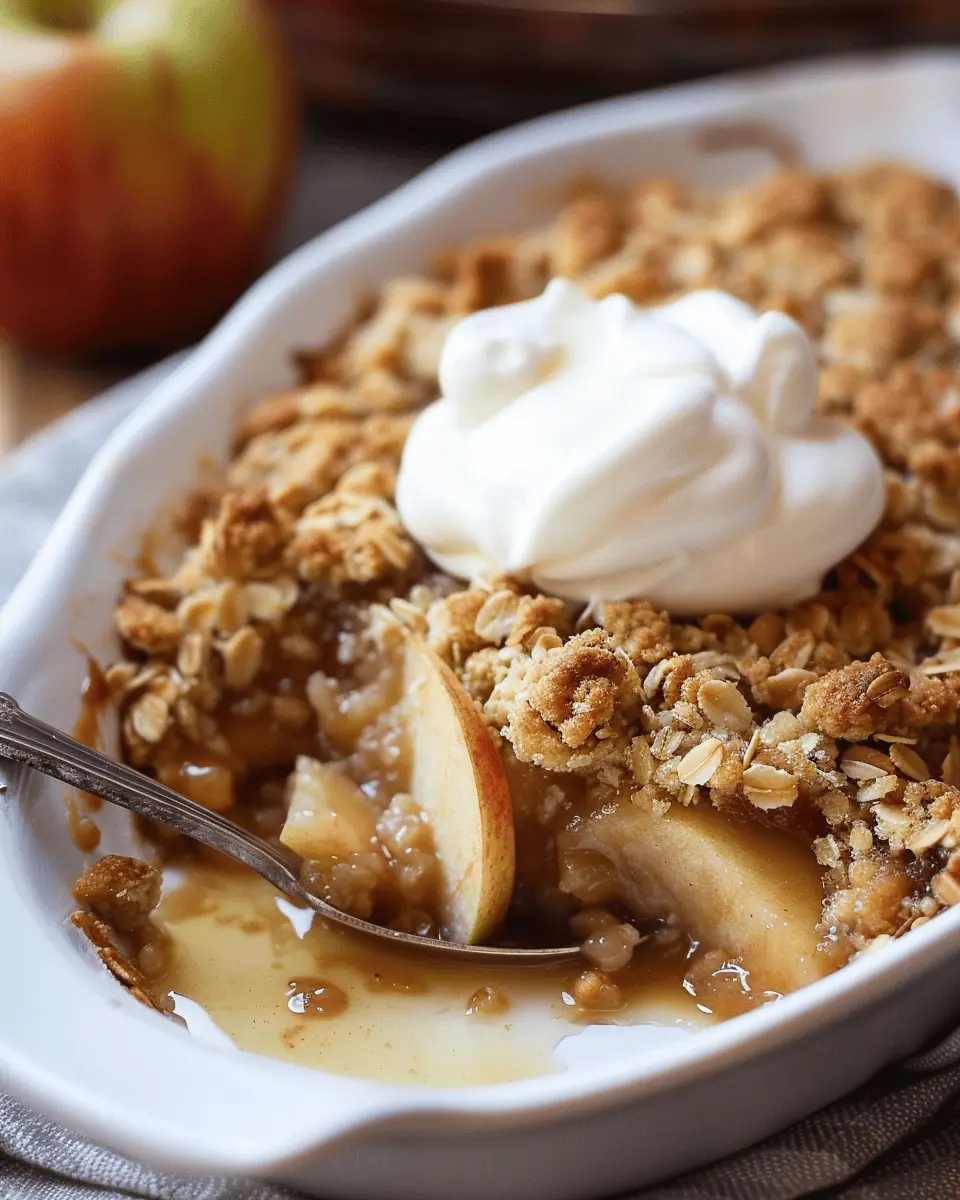
There’s something magical about the combination of apple crisp and a scoop of ice cream. Whether it’s classic vanilla, creamy caramel, or even a rich cinnamon swirl, ice cream adds a delightful contrast to the warm spices and tender apples. Drizzling your dessert with caramel sauce elevates the experience, turning your easy apple crisp into an indulgent treat. Why not impress guests with this stunning presentation? A dollop of whipped cream on top can also add a light, airy texture.
Enjoying it Warm or Cold
One of the best things about apple crisp is its versatility. While warm serves up that comforting, cozy feeling, letting it chill in the fridge can bring out a different flavor profile. Enjoying it cold can highlight the sweet and tart nuances of the apples. Leftovers? Perfect as a quick breakfast or an afternoon snack—perhaps paired with a hot cup of herbal tea or coffee.
For more ideas on how to serve apple crisp, check out this guide. It’s packed with inspiration!
Time breakdown for Easy Apple Crisp
Preparation time
Preparing your apple crisp is a breeze! You’ll spend about 15 minutes peeling and slicing your apples, mixing the sugars, and assembling everything in a baking dish. Don’t worry if you’re new to cooking—this step is all about embracing the process. Consider putting on some music or a podcast to make it enjoyable!
Baking time
Once your apple crisp is in the oven, let it bake for about 30-35 minutes. You’ll know it’s ready when the top is golden brown and the apples are bubbling. The mouthwatering aroma that fills your kitchen during this time is simply unbeatable!
Total time
In total, you’re looking at around 45-50 minutes from start to finish. That’s it! A short amount of time for a delicious dessert that’s a crowd-pleaser for any gathering. Plus, it’s perfect when served warm with a scoop of vanilla ice cream. Why not explore more easy dessert ideas that fit into your busy schedule? Check out this guide for some inspiration!
Nutritional Facts for Easy Apple Crisp
Calories per serving
When you indulge in this comforting apple crisp, you’ll find each serving is approximately 200-250 calories. This range can vary depending on the toppings and ingredients you choose, but it’s a delicious way to satisfy your sweet tooth without feeling guilty.
Sugar and fiber content
The sugar content in your apple crisp can hover around 18 grams, primarily from the apples and any added sweeteners. On the plus side, you’ll also enjoy about 4 grams of dietary fiber—which is great for digestion! According to the American Heart Association, dietary fiber can help lower cholesterol and regulate blood sugar levels.
Feel free to explore healthier alternatives, like using natural sweeteners, to reduce sugar intake while still relishing your crisp. For more information on sugar and health, you can check out resources from the Centers for Disease Control and Prevention here.
Making informed choices about your apple crisp can enhance your enjoyment of this delightful treat!
FAQs about Easy Apple Crisp
Can I use frozen apples for apple crisp?
Absolutely! Using frozen apples is a great option, especially if fresh apples are out of season or if you’re looking to save time. Just ensure that you thaw them completely and drain any excess moisture before mixing them with your sugar and spice blend. The great thing about apple crisp is that it can be quite forgiving, so don’t hesitate to embrace the convenience of your freezer.
How can I store leftover apple crisp?
If you find yourself with some delicious apple crisp leftovers (though I doubt there will be much!), storing it is simple. Let the dish cool completely, then cover it tightly with plastic wrap or aluminum foil. It will stay fresh in the refrigerator for about 3 to 4 days. You can also freeze it for longer storage; just portion it out in airtight containers or freezer bags. When you’re ready to enjoy it again, it’s best to reheat in the oven to regain that glorious crisp topping.
What are the signs that my apple crisp is done baking?
Knowing when your apple crisp is perfectly done is key to achieving that delightful balance of textures. Look for a golden-brown topping that is bubbly around the edges. If you poke a fork into the apples, they should be tender, but still hold their shape. You might even see some apples peeking through that crispy layer—perfection! If you’d like more in-depth baking tips, check out resources from the American Institute of Baking for expert advice.
With these tips in hand, you’re all set to make a delicious and comforting apple crisp that will impress your friends and satisfy your taste buds!
Conclusion on Easy Apple Crisp
The comfort and joy of sharing apple crisp with loved ones
Making an easy apple crisp is more than just creating a delightful dessert; it’s about fostering connections. Imagine gathering around the table as the aroma of baked apples and cinnamon wafts through the air, inviting everyone to dig into a warm, crispy treat.
Whether it’s a cozy family dinner or a casual get-together with friends, serving this classic dessert can make any occasion feel special. Plus, with just a few simple ingredients, it’s a breeze to whip up, allowing you extra time to enjoy the company of those you care about. For more inspiration on delightful desserts, check out resources like AllRecipes or The Spruce Eats. So, grab those apples and create a moment worth sharing!
PrintApple Crisp Delight: Easy Homemade Recipe for Cozy Evenings

Indulge in the warm, comforting flavors of homemade apple crisp that is perfect for cozy evenings.
- Prep Time: 15 minutes
- Cook Time: 45 minutes
- Total Time: 1 hour
- Yield: 8 servings 1x
- Category: Dessert
- Method: Baking
- Cuisine: American
- Diet: Vegetarian
Ingredients
- 6 cups sliced apples
- 1 cup brown sugar
- 1 cup oatmeal
- 1 cup all-purpose flour
- 1 tsp cinnamon
- 1/2 cup butter, softened
Instructions
- Preheat your oven to 350°F (175°C).
- In a bowl, mix the sliced apples with brown sugar and cinnamon.
- Spread the apple mixture in a baking dish.
- In another bowl, combine oatmeal, flour, and softened butter to create a crumbly topping.
- Evenly distribute the topping over the apples in the baking dish.
- Bake for 45 minutes or until the apples are tender and the topping is golden brown.
Notes
- Serve warm with vanilla ice cream for an extra treat.
- Adjust the sweetness according to the tartness of the apples used.
Nutrition
- Serving Size: 1 serving
- Calories: 250
- Sugar: 15g
- Sodium: 200mg
- Fat: 10g
- Saturated Fat: 6g
- Unsaturated Fat: 3g
- Trans Fat: 0g
- Carbohydrates: 35g
- Fiber: 3g
- Protein: 2g
- Cholesterol: 20mg
Keywords: apple crisp, dessert, homemade, cozy, easy recipe