Introduction to Homemade Chocolate Turtles
Have you ever tasted those irresistible chocolate turtles from the candy aisle, and thought, “I could make these!”? Well, you absolutely can, and it’s easier than you might think! Making homemade chocolate turtles at home not only allows you to control the ingredients but also offers an opportunity to customize and make these treats truly your own.
Why Choose Homemade Chocolate Turtles Over Store-Bought?
Quality Ingredients
When you make chocolate turtles at home, you get to choose high-quality ingredients. Think about it—when you purchase store-bought treats, you often find a laundry list of additives and preservatives. By using simple ingredients like fresh pecans, creamy caramel, and rich chocolate, you ensure your creations taste just as good as they look—without any mystery components.
Healthier Options
If you’re conscious about what you eat, making your own turtles means you can experiment with healthier alternatives. Want to swap out the traditional caramel for a dairy-free version or use dark chocolate instead of milk? Go for it! This flexibility not only allows for healthier choices but can also cater to dietary preferences and restrictions.
Creative Customization
Imagine the delight in crafting your own unique flavor combinations. What about adding a sprinkle of sea salt, or infusing the chocolate with spices? You can also experiment with different nuts. While pecans are classic, why not try walnuts or almonds for a twist? The possibilities are endless, giving you a chance to showcase your culinary creativity.
Gift-Worthy Treats
Let’s be honest; everyone enjoys receiving homemade goodies. Crafting homemade chocolate turtles can transform a simple treat into a thoughtful gift. Package them in a nice box, add a personal note, and you have a heartfelt present for friends or colleagues at any time of the year.
Finally, making turtles together can become a wonderful bonding experience with friends or family. Bake, share stories, and enjoy the process—after all, isn’t that what the best memories are made of? If you’re ready to dive in, go ahead and check out this step-by-step guide to get started!
Ingredients for Homemade Chocolate Turtles
Essential Ingredients for Your Turtles
Embarking on your journey to create delicious homemade chocolate turtles starts with gathering some essential ingredients. These delightful treats typically require:
- Pecans: The star of the show, these nuts provide that perfect crunch and nutty flavor.
- Caramel: You can either make it from scratch or use store-bought for convenience.
- Chocolate: Milk chocolate is traditional, but dark chocolate can lend a more sophisticated taste.
- Sea salt: A sprinkle on top enhances the flavors beautifully.
Each of these ingredients works in harmony to create a treat that’s sure to impress friends and family alike.
Alternative Ingredient Options
If you’re feeling adventurous or need to cater to specific dietary preferences, there are several alternatives you can consider:
- Nut Substitutes: If pecans aren’t your thing, almonds or cashews can also work wonderfully.
- Vegan Caramel: Look for recipes that use coconut cream or dates as a base.
- Chocolate Varieties: White chocolate or sugar-free chocolate options can be used if you want to switch things up.
Feeling inspired yet? These little tweaks can make your homemade chocolate turtles even more unique! For more ideas, check out this article on creative turtle candy variations.
Preparing Homemade Chocolate Turtles
Creating delicious homemade chocolate turtles is a delightful kitchen adventure that yields a sweet and crunchy treat, perfect for sharing or indulging in yourself. Let’s dive into the steps necessary for making these delightful confectioneries!
Gather Your Equipment
Before you begin, it’s essential to gather all the necessary equipment to streamline your chocolate turtle-making process. You’ll need:
- A baking sheet
- Parchment paper or a silicone baking mat
- A large microwave-safe bowl
- A medium saucepan (if you’re opting for traditional caramel)
- A spatula or wooden spoon
- A cookie scoop or tablespoon for forming clusters
- Your chocolate melting pot or microwave for the chocolate coating
Once you have all your tools in place, it’s time to kick things off! Having everything ready to go makes the process easier and more enjoyable.
Toasting the Pecans
Toasting the pecans brings out their rich flavor and adds a delightful crunch to your homemade chocolate turtles. Preheat your oven to 350°F (175°C). Spread the pecans in a single layer on a baking sheet and bake for about 8-10 minutes.
Keep a close eye on them, as they can go from perfectly toasted to burnt quite quickly! The nuts should be aromatic and slightly darker in color when they’re done. This simple step can significantly enhance the flavor—don’t skip it!
Making the Microwave Caramel
Making caramel can seem daunting, but using the microwave simplifies the process significantly. In a microwave-safe bowl, combine:
- 1 cup of unwrapped caramels
- 2 tablespoons of milk or cream (this helps achieve that gooey texture)
Microwave in 30-second bursts, stirring in between until the mixture is smooth and completely melted. This typically takes about 2-3 minutes. If you’re curious about more advanced caramel-making techniques, you can find extensive guides and tips from resources like Serious Eats.
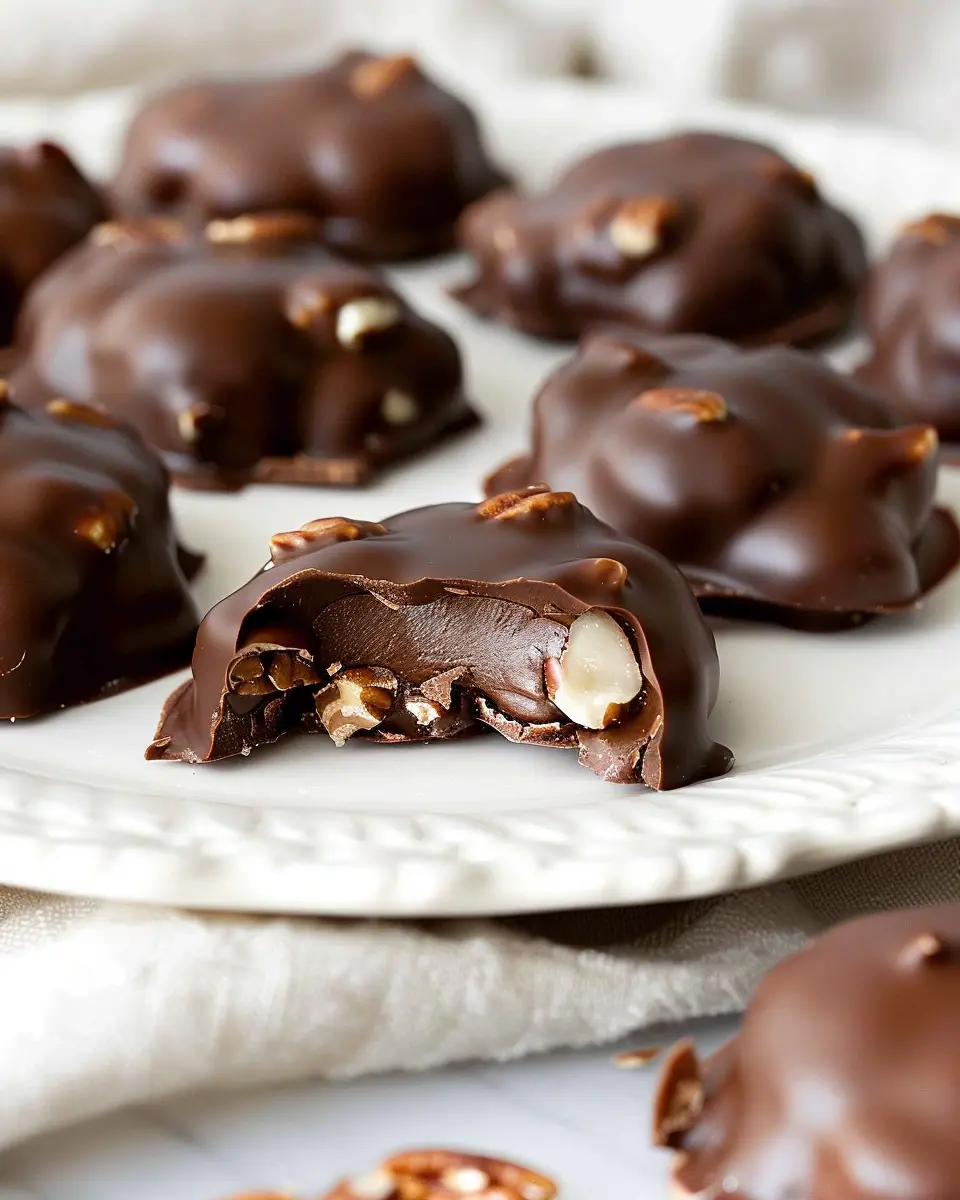
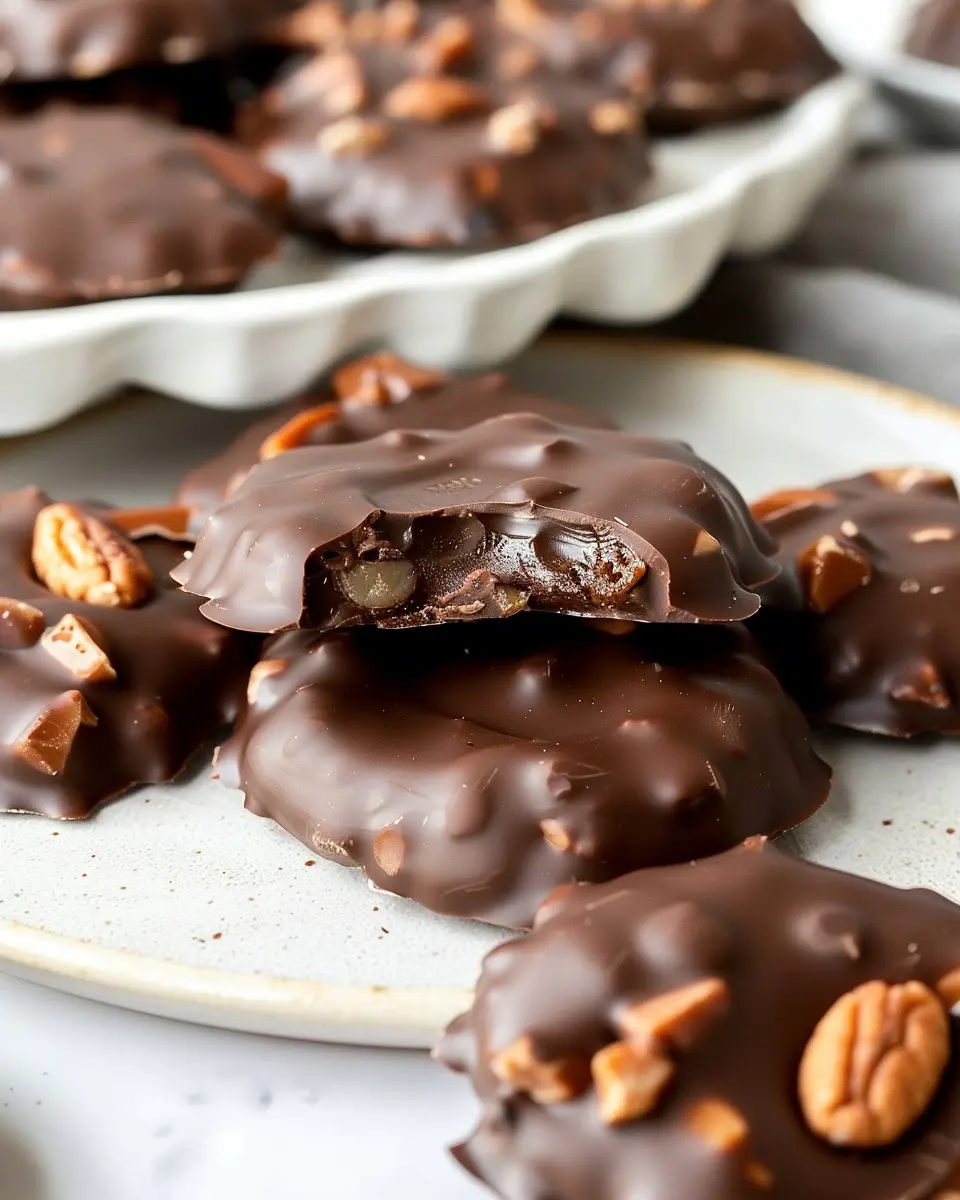
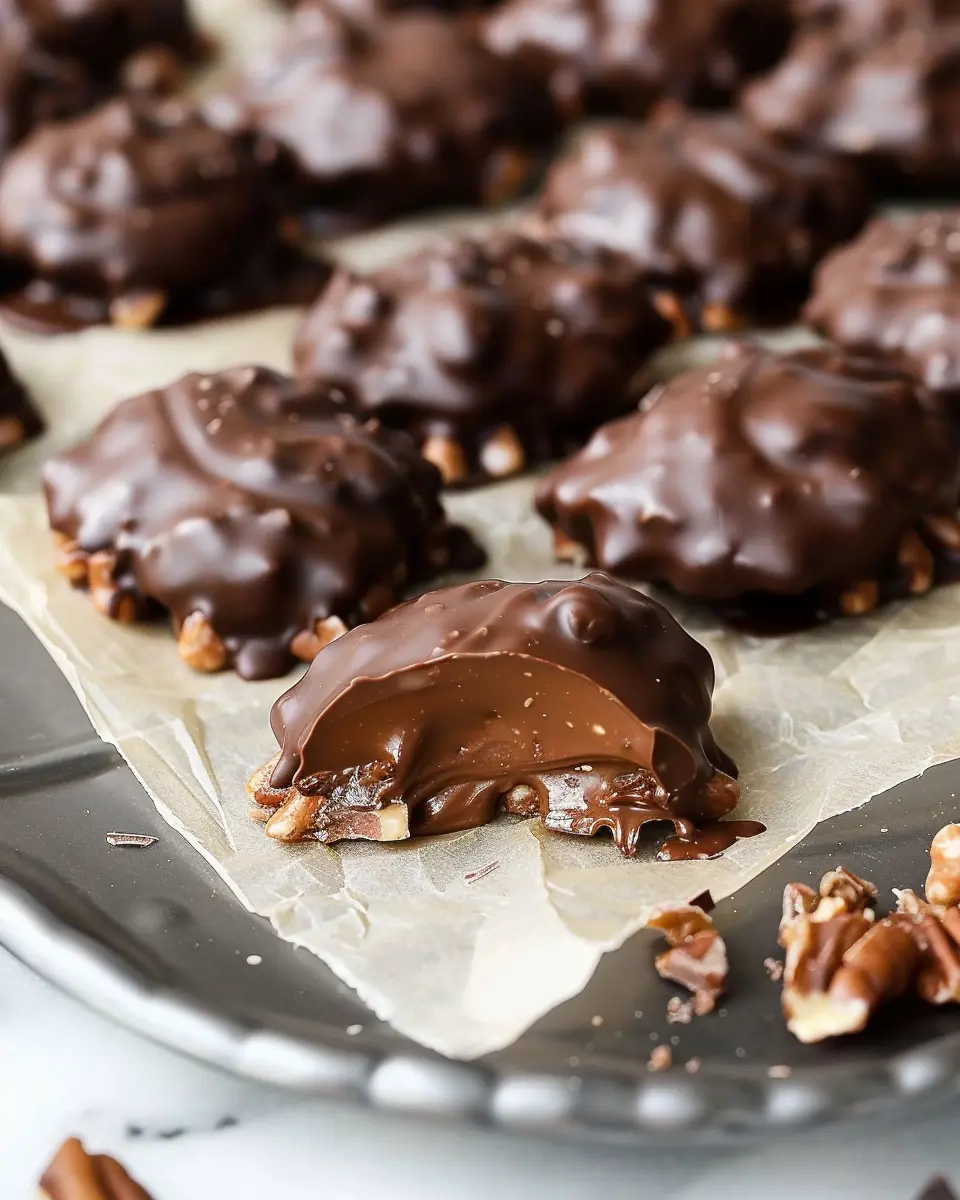
Forming the Turtle Clusters
Once your pecans are toasted and caramel is ready, it’s time to assemble the turtle clusters. On the prepared baking sheet, start by forming little mounds of pecans. You’ll want about 3-5 pecans for each cluster. Then, using a tablespoon or a cookie scoop, carefully drizzle a spoonful of the melted caramel over the pecans, making sure they’re well-coated.
Picture this: the warmth of the caramel hugging those crunchy, nutty clusters is irresistible. Let them cool for a few minutes as you prepare for the next step.
Melting the Chocolate
Now comes the fun part! Melt your chocolate (dark, milk, or white—your choice) in a microwave-safe bowl or a double boiler. If using the microwave, heat in 30-second intervals, stirring after each burst until fully melted and smooth. The goal is a glossy chocolate that’s perfect for dipping.
You can also use chocolate chips or chocolate bars, breaking them into smaller pieces for easier melting. Don’t forget to keep some chocolate for drizzling on top for that finished look!
Dipping and Setting
With your chocolate melted, it’s time to dip those caramel-coated pecan clusters. Using a fork or tongs, gently lower each cluster into the chocolate, ensuring they’re fully covered. Then, place them back on the parchment-lined baking sheet.
After dipping, you can sprinkle a touch of sea salt on top for an extra flavor dimension. Let the clusters sit at room temperature to set, or speed up the process by placing them in the fridge for about 30 minutes.
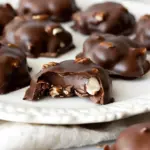
And voila! Your homemade chocolate turtles are ready to enjoy. Don’t be surprised if they disappear quickly—you might want to make a double batch for sharing!
Variations on Homemade Chocolate Turtles
When it comes to homemade chocolate turtles, the fun doesn’t stop at the classic combination of pecans, caramel, and chocolate! Get creative with these delightful variations that will cater to different tastes and dietary preferences.
Nut-Free Chocolate Turtles
Not everyone can enjoy nuts, so why not create delicious nut-free chocolate turtles? Substitute the pecans with crunchy ingredients like pretzels or rice cereal. Here’s how you can make them:
- Use crushed pretzels for a salty crunch, or add crispy rice cereal for a light and airy texture.
- Top with your favorite chocolate—dark, milk, or white—and drizzle with caramel or even a hint of honey for added sweetness.
- Get inspired by similar recipes at resources like Serious Eats for additional nut-free options!
These variations are just as satisfying and will ensure everyone can indulge in the treat.
Flavor-Infused Chocolate Turtles
Elevate your homemade chocolate turtles by experimenting with flavors. Sweet, salty, and unique infusions can make these treats unforgettable.
- Coffee Infused: Mix a little espresso powder into your chocolate. The coffee complements the chocolate beautifully and gives a bold twist.
- Spicy Kick: Add a pinch of cayenne pepper or chili powder to your caramel for a sweet and spicy contrast that will awaken your taste buds.
- Citrus Zing: A splash of orange or lemon zest can brighten up the caramel, adding a refreshing taste profile.
These adaptations can turn your kitchen into a flavor lab, making your homemade chocolate turtles not just a treat, but also an experience to savor. What creative twists will you add to your next batch?
Cooking Tips and Notes for Homemade Chocolate Turtles
Ensuring a Smooth Caramel Consistency
One of the keys to making homemade chocolate turtles is achieving a silky caramel texture. To ensure this, start by cooking your sugar over medium heat, stirring constantly to avoid burning. Utilizing a candy thermometer can be incredibly helpful; aim for a temperature of around 245°F (118°C) for that perfect chewy consistency. If your caramel starts to crystallize, don’t panic! You can rescue it by adding a splash of water and gently reheating it.
Tips for Melting Chocolate Perfectly
Melting chocolate might seem straightforward, but it can be finicky. For the best results when coating your turtles, chop the chocolate into small, even pieces for uniform melting. Consider using the double boiler method or a microwave in short bursts, stirring often. Keep in mind that adding a teaspoon of coconut oil can help achieve a smoother coating. And don’t forget—let your homemade chocolate turtles set at room temperature rather than the fridge; this keeps the chocolate shiny and avoids a dull finish.
For more tips on decadent desserts, check out Serious Eats for expert advice!

Serving Suggestions for Homemade Chocolate Turtles
Ideal Pairings and Presentation
When serving your homemade chocolate turtles, consider pairing them with complementary flavors to enhance their rich, gooey goodness. For a delightful contrast, try serving them alongside fresh fruits like strawberries or orange slices; the acidity and freshness will balance the richness of the chocolate.
For a cozy evening, a cup of chai tea or coffee works wonders too, especially with a hint of cinnamon to bring out those nutty flavors. Presenting your turtles on a rustic wooden platter can add a touch of warmth. You might even sprinkle some sea salt on top for an appealing visual and flavor contrast. Don’t forget to share some stories or fun facts about your candy-making process!
Creative Packaging Ideas for Gifts
If you’re thinking about giving your homemade chocolate turtles as gifts, why not get creative with your packaging? Use clear cellophane bags tied with colorful ribbons for a simple yet attractive presentation. You can also repurpose small jars or tin boxes. Add a handwritten note detailing the ingredients for an extra personal touch.
If you’re looking for more elaborate ideas, consider crafting themed gift sets! Pair your turtles with items like gourmet hot cocoa mix or artisanal chocolate bars. Not only does this make your gift feel special, but it also encourages the recipient to enjoy a whole indulgent experience.
Time Breakdown for Homemade Chocolate Turtles
Preparation Time
Getting started on your homemade chocolate turtles takes about 20 minutes. This includes gathering all your ingredients and prepping your workspace. You’ll want to have your pecans, caramel, and chocolate conveniently at hand. A bit of organization goes a long way in the kitchen!
Cooking Time
The actual cooking time is approximately 15 minutes. Melting the chocolate and caramel is a delicate process; it requires your attention to achieve that perfect consistency. You’ll want to keep an eye on those turtles as they come together!
Total Time
When you combine both preparation and cooking times, you’re looking at roughly 35 minutes from start to finish. In no time, you’ll have a delightful batch of homemade chocolate turtles ready to impress your friends and satisfy your sweet tooth. Want to elevate your dessert game? Check out this guide on why homemade treats are better than store-bought.
Nutritional Facts for Homemade Chocolate Turtles
Calories Per Serving
When indulging in homemade chocolate turtles, you might be pleasantly surprised by their reasonable caloric content. Each delightful serving typically contains around 150–200 calories. This makes them a nice treat when you’re looking to satisfy a sweet tooth without completely derailing your healthy eating goals.
Key Nutrients
These chocolatey treasures not only taste great but also provide some nutritional benefits:
- Healthy Fats: The nuts often used give you a good dose of heart-healthy fats.
- Protein: With nuts as a primary ingredient, you’re also getting a boost of protein that can help keep you satisfied.
- Antioxidants: Dark chocolate is rich in antioxidants, which can be beneficial for overall health, as detailed by Healthline.
It’s essential to enjoy them in moderation, but knowing their nutritional value makes these homemade chocolate turtles a guilt-free pleasure. Plus, you can always adjust the recipe to fit your dietary needs! For a deeper dive into nutrition, check out Nutrition.gov for more tips.
FAQs about Homemade Chocolate Turtles
Can I use dark chocolate instead of almond bark?
Absolutely! While almond bark offers a sweet and creamy base, using dark chocolate in your homemade chocolate turtles can elevate their taste profile. If you prefer a richer and slightly less sweet flavor, go for high-quality dark chocolate with a cocoa content of at least 60%. Just make sure to gently melt it to maintain its smoothness.
How should I store my Chocolate Turtles?
To keep your homemade chocolate turtles in tip-top shape, store them in an airtight container. If you have layers of turtles, separate them with parchment paper to avoid sticking. A cool, dark place is ideal—think pantry or cupboard. However, avoid damp areas since moisture can ruin those delightful chocolate coatings.
What’s the best way to keep them fresh?
To maximize freshness, try to consume your homemade chocolate turtles within one to two weeks. If you plan to keep them longer, consider refrigerating them in an airtight container. Just allow them to come back to room temperature before indulging; this will ensure that you enjoy their full flavor and texture. For more tips on chocolate storage, check out the insights from the Chocolate Manufacturers Association.
If you find yourself with a large batch, you can also freeze your turtles. Just remember to wrap them securely in plastic wrap and then a foil layer. When you’re ready to enjoy your turtles again, let them thaw on the counter, and you’ll be all set for a chocolatey treat!
Conclusion on Homemade Chocolate Turtles
Recap of Why You’ll Love Homemade Turtles
In essence, homemade chocolate turtles deliver a delightful blend of flavors and textures that make them irresistible. You’ll love how each bite combines rich, smooth chocolate with crunchy nuts and sweet caramel, bringing back nostalgic memories of childhood treats. Easy to customize, they’re perfect for sharing or enjoying solo during a cozy night in.
Making these treats from scratch not only provides a sense of accomplishment but also allows you to control the ingredients. Why settle for store-bought when you can whip up your own delicious creations? So grab your ingredients, and enjoy the sweet satisfaction of crafting your own chocolate turtles at home! For more inspiration, check out Serious Eats for innovative dessert ideas.
PrintHomemade Chocolate Turtles: Easy Indulgence for Everyone
Make delicious homemade chocolate turtles that everyone will love, combining chocolate, caramel, and nuts in one easy recipe.
- Prep Time: 15 minutes
- Cook Time: 30 minutes
- Total Time: 45 minutes
- Yield: 24 pieces 1x
- Category: Dessert
- Method: Baking
- Cuisine: American
- Diet: Vegetarian
Ingredients
- 1 cup pecans
- 1 cup soft caramel candies
- 8 ounces semisweet chocolate
Instructions
- Preheat your oven to 350°F (175°C).
- Spread the pecans on a baking sheet and toast for about 10 minutes.
- Melt the caramel candies in a saucepan over low heat.
- Once melted, place a spoonful of caramel on each pecan.
- In a separate saucepan, melt the semisweet chocolate until smooth.
- Drizzle the melted chocolate over the caramel-covered pecans.
- Let them cool completely before serving.
Notes
- For a variation, try using different types of nuts.
- Ensure the chocolate is tempered for a glossy finish.
Nutrition
- Serving Size: 2 pieces
- Calories: 150
- Sugar: 12g
- Sodium: 50mg
- Fat: 8g
- Saturated Fat: 4g
- Unsaturated Fat: 3g
- Trans Fat: 0g
- Carbohydrates: 18g
- Fiber: 1g
- Protein: 2g
- Cholesterol: 5mg
Keywords: Homemade Chocolate Turtles, Chocolate Dessert, Easy Recipe