
Why Should You Make Apple Cobbler at Home?
If you’re like many young professionals, your schedule is packed, but your cravings for comfort food can’t be ignored. That’s where making apple cobbler at home comes into play. Not only is it delicious, but it’s also surprisingly easy to whip up. Let’s dive into why you should embrace this delightful dessert!
A Taste of Nostalgia
Apple cobbler is rooted in tradition and brings back warm memories of family gatherings and cozy evenings. By learning how to make apple cobbler, you connect with that heritage, even in your busy life. Imagine serving this warm, gooey dessert with a scoop of vanilla ice cream after a long workday—instant comfort!
Easy and Satisfying
The beauty of apple cobbler lies in its simplicity. With just a handful of ingredients, you can create a dessert that feels gourmet. You don’t need culinary school experience; this recipe allows you to shine in the kitchen without the stress. Plus, it’s a great opportunity to experiment with different apple varieties, like Granny Smith for tartness or Honeycrisp for sweetness.
Healthy Alternatives
Many pre-packaged desserts are loaded with preservatives and artificial ingredients. When you make your own apple cobbler, you can control what goes into it. For instance, opt for natural sweeteners like honey or maple syrup if you’re watching your sugar intake. You can even enhance the flavor with spices like cinnamon and nutmeg.
Impress Your Friends
Hosting friends for a gathering? Whether you just want to impress your coworker or create a cozy setting for a first date, serving homemade apple cobbler will definitely earn you some major points. It’s a conversation starter, a dessert audience loves, and it shows that you care—it’s the ultimate trifecta!
Get Started!
Ready to tackle this delicious recipe? Gather your ingredients, roll up your sleeves, and turn your kitchen into a hub of sweet aromas. And don’t forget to check out this great resource for tips on perfecting your cobbler technique.
Making apple cobbler isn’t just about the dessert; it’s about creating memories, enjoying the process, and sharing joy with others. So give it a shot—you might just find your new favorite way to unwind after a busy week!
Ingredients for Apple Cobbler
When it comes to making a delicious apple cobbler, having the right ingredients is crucial for that comforting flavor and texture you crave. Let’s break it down!
Essential Ingredients for the Filling
The filling is where the magic begins. You’ll need:
- Fresh apples: About 6 cups of thinly sliced apples, preferably Granny Smith for their tartness.
- Sugar: A combination of granulated sugar and brown sugar (around 1 cup total) enhances the sweetness and gives depth.
- Cinnamon: Around 1 teaspoon for that warm, inviting flavor.
- Lemon juice: A tablespoon adds brightness and balances the sweetness.
- Cornstarch: Just 2 tablespoons will help thicken the mixture.
For a bit of inspiration on selecting the best apples, check out expert recommendations here.
Key Ingredients for the Topping
The topping is what gives your cobbler its signature crust. Make sure you have:
- All-purpose flour: 1 cup creates a nice base.
- Baking powder: 1 tablespoon for fluffiness.
- Sugar: Another 1/2 cup for a sweet touch.
- Salt: Just a pinch enhances the flavors.
- Unsalted butter: 1/2 cup, melted makes it rich and tender.
- Milk: About 1/2 cup gives it the perfect consistency.
With these ingredients in hand, you’re on your way to mastering how to make apple cobbler! It’ll be a crowd-pleaser that’s perfect for cozy nights and gatherings. Ready to get baking?
Step-by-Step Preparation of Apple Cobbler
Making an apple cobbler is an excellent way to embrace the deliciousness of apples—especially in the fall. This recipe is simple enough for a weeknight dessert but impressive enough to serve at gatherings. Let’s dive into how to make apple cobbler step-by-step!
Selecting Your Apples
When choosing apples, think about flavor and texture. For a truly scrumptious cobbler, you might want to combine different varieties. Here are some popular options:
- Granny Smith: Tart and firm, great for contrast.
- Honeycrisp: Sweet, juicy, and adds depth.
- Golden Delicious: Softens nicely during cooking, lending sweetness.
Make a trip to your local farmer’s market or grocery store (perhaps check out this Apple Varieties Guide) to find the freshest apples. Aim for around six to eight medium-sized apples, depending on how much filling you’d like.
Peeling and Slicing the Apples
Once you’ve picked your apples, it’s time to prep them. Here’s how:
- Wash your apples thoroughly to remove any wax or pesticides.
- Peel the apples using a vegetable peeler, being careful to remove any bruised spots.
- Slice them thinly—about 1/4 inch thickness works best.
This method ensures the apples cook evenly and blend well with the topping. If you’re not keen on peeling, you can leave the skins on for extra texture—but keep in mind it’ll change the final flavor a bit.
Preparing the Apple Filling
Now that your apples are sliced, let’s make that filling shine. In a large bowl, combine your prepared apples with:
- 1 cup of sugar (adjust to taste)
- 2 tablespoons of flour (to thicken)
- 1 teaspoon cinnamon (a must for that cozy flavor)
- A pinch of nutmeg (optional, but adds warmth)
- 1 tablespoon of lemon juice (to keep apples fresh and bright)
Toss it all together until the apples are well-coated. This mixture will generate a luscious sauce during baking, adding to the overall deliciousness of the cobbler.
Cooking the Apples (Optional)
For an extra layer of flavor, consider cooking the apples before assembling the cobbler. Here’s how to do it:
- Heat a large skillet over medium heat.
- Add the prepared apples along with your sugar mixture and cook for about 5-10 minutes, stirring occasionally until the apples begin to soften.
This process not only enhances the flavor but also reduces the baking time, resulting in an effortlessly tender filling.
Making the Topping
No apple cobbler is complete without a delightful topping. Here’s a simple recipe:
- 1 cup all-purpose flour
- 1/2 cup sugar
- 1/2 teaspoon baking powder
- 1/4 teaspoon salt
- 1/2 cup unsalted butter, melted
- 1 cup milk
- 1 teaspoon vanilla extract
In a mixing bowl, combine the dry ingredients, then pour in the melted butter, milk, and vanilla. Stir until just combined. The batter will be quite loose, which will form a delicious crust as it bakes.
Assembling and Baking the Cobbler
Now comes the fun part—putting it all together! Preheat your oven to 350°F (175°C).
- Grease a baking dish—a 9×13 inch works great.
- Pour the apple filling into the greased dish and spread it out evenly.
- Drizzle the batter over the top of the apples. Don’t worry about making it perfect; it’s the rustic look that adds to the charm.
- Bake in the preheated oven for about 40-50 minutes, or until the topping is golden brown and a toothpick inserted in the center comes out clean.
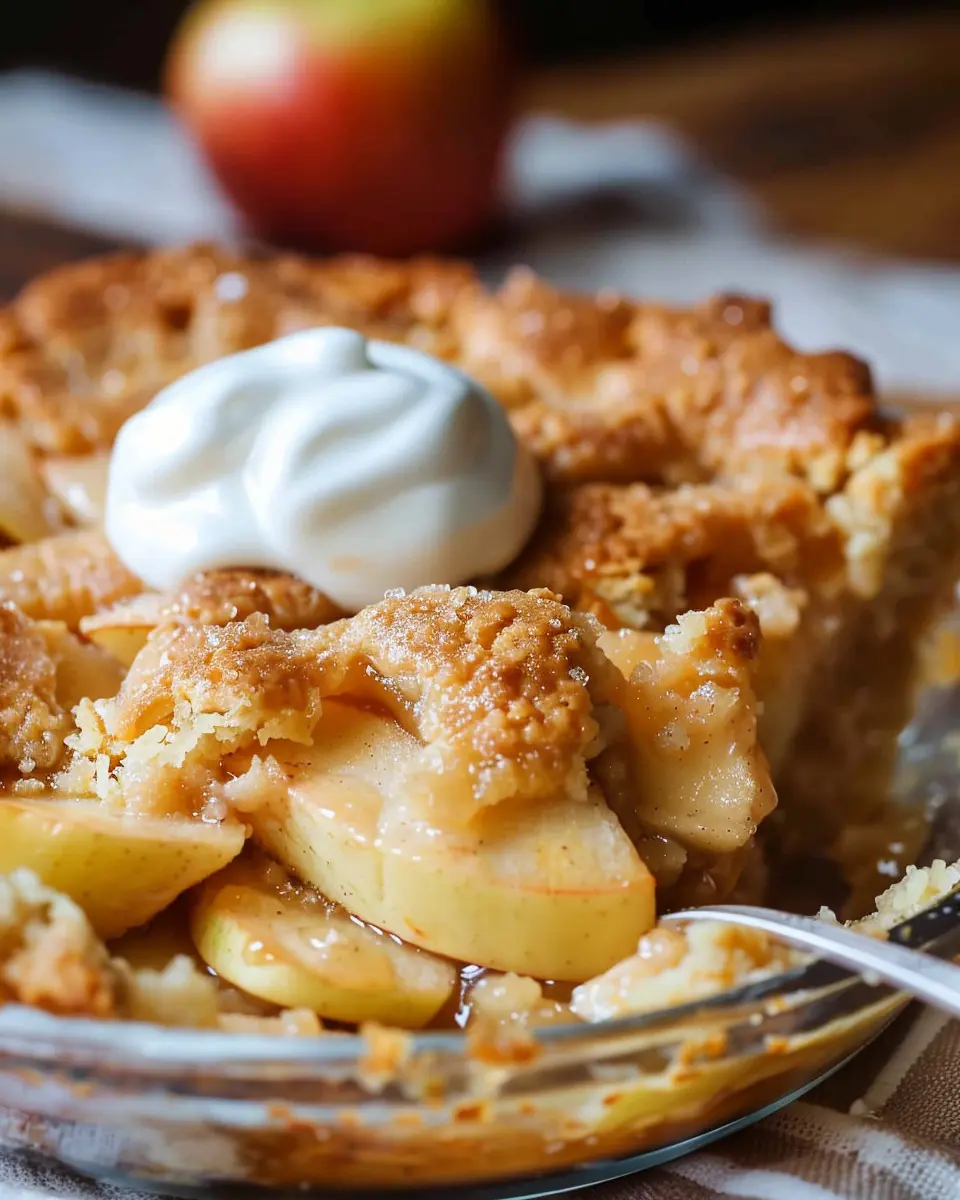
Let it cool for a few minutes before digging in. Serve warm with a scoop of vanilla ice cream for the ultimate treat!
By following these steps on how to make apple cobbler, you’ll create a comforting dessert that’s sure to delight both friends and family. Embrace the process, and savor the rich aromas that fill your kitchen—it’s a lovely part of cooking!
Variations on Apple Cobbler
When you’re learning how to make apple cobbler, variety is your best friend. It’s not just about the apples anymore! Here are some inventive variations to elevate your dessert experience.
Gluten-Free Versions
Don’t let dietary restrictions hold you back from enjoying this classic dessert! For a gluten-free cobbler, replace regular flour with almond flour or a gluten-free baking blend. Additionally, using oats in place of some of the flour creates a delightful texture while still being friendly to gluten-sensitive diets. Check out the Gluten-Free Girl for more tips on baking without gluten.
Fruit Combinations for Unique Flavors
Why stop at apples? Mixing different fruits can introduce exciting flavors! Consider the following combinations:
- Apple and Pear: This duo creates a beautiful blend of sweetness and tartness.
- Apple and Berries: Add blueberries or raspberries for a burst of color and tang.
- Tropical Twist: Try mixing apples with pineapple for a refreshing take on cobbler.
Experimenting with different fruits not only enhances flavor but also introduces new textures, ensuring your apple cobbler stays exciting.
Creative Topping Ideas
Don’t forget the topping! While a traditional biscuit topping is delightful, think outside the box:
- Nut Crumble: A mixture of chopped nuts, oats, and a bit of butter can add a satisfying crunch.
- Spiced Whipped Cream: Infuse your whipped cream with cinnamon or vanilla for an extra flavor kick.
- Ice Cream or Yogurt: Serve your cobbler warm with a scoop of vanilla ice cream or a dollop of Greek yogurt for a creamy contrast.
These variations on apple cobbler will make you the star of any gathering, and you’ll never make the same cobbler twice!
Cooking Tips and Notes for Apple Cobbler
Choosing the Right Apples
When considering how to make apple cobbler, the type of apples you choose can significantly impact the flavor and texture. Opt for a mix of tart and sweet apples, like Granny Smith for tartness and Honeycrisp for sweetness. This balance creates a delicious depth of flavor. Remember, fresh, crisp apples make a world of difference!
Sweetness Adjustments
Depending on the apple variety, you might need to adjust the sugar. If your apples are particularly sweet, you can reduce the sugar in your recipe. Conversely, if they have a tart bite, a little extra sugar can enhance the overall taste. Taste your apple mixture before baking; it should be pleasantly sweet but not overly so.
Perfecting Cooking Times
While baking, keep an eye on your cobbler. The golden brown topping should be crisp while the filling bubbles underneath. Ideally, check around the 30-minute mark. If the top is browning too quickly, cover it with foil to prevent burning. For further tips, you can refer to resources like the Joy of Cooking website, which has great insights on fruit desserts.
With these tips, you’ll master tasty apple cobbler that impresses every time!

Serving Suggestions for Apple Cobbler
Ideal Accompaniments
When it comes to enjoying your delicious Apple Cobbler, the right accompaniments can elevate this classic dessert to new heights. Here are some favorites to consider:
- Vanilla Ice Cream: A scoop of creamy vanilla ice cream melting atop warm cobbler creates a delightful contrast between hot and cold.
- Whipped Cream: Light and airy, homemade whipped cream adds a sweet touch that complements the spiced apples beautifully.
- Caramel Sauce: Drizzle some caramel sauce over the top for an indulgent twist that balances the tartness of the apples.
Feeling adventurous? You could experiment with flavored syrups like maple or chocolate for a unique flair.
Presentation Tips
For a stunning presentation, consider serving your Apple Cobbler directly from the baking dish, or transfer individual portions into ramekins. Top each serving with a sprinkle of cinnamon and a sprig of mint for a pop of color. Using colorful plates can make your dessert visually appealing and even more inviting!
If you’re wondering how to make apple cobbler stand out at your next gathering, check out some plating ideas from The Kitchn. They offer fantastic tips on making your desserts look as good as they taste!
Incorporating seasonal touches, like a dash of nutmeg or fresh apples on the side, can also excite your guests’ taste buds and imagination. Enjoy crafting a memorable dessert experience!
Time Breakdown for Apple Cobbler
Preparation Time
When you’re gearing up to learn how to make apple cobbler, you’ll want to set aside about 30 minutes for preparation. This includes washing, peeling, and slicing your apples to perfection, as well as mixing in those delightful spices that enhance their flavor. If you’re feeling a bit rushed during the weekday, you can totally prep the apples ahead of time and stash them in the fridge!
Cooking Time
Once your cobbler is in the oven, you can relax for about 45 minutes as it bakes. This time allows the apples to soften and the crust to become that golden, crispy perfection we all crave. Set a timer—this part can be hard when you’re eagerly anticipating that delicious smell wafting through your kitchen.
Total Time
In total, you’re looking at around 1 hour and 15 minutes from start to finish. That’s a small commitment for a delightful dessert that will surely impress family and friends. Think of it as a quality investment in your baking skills! If you’re interested in perfecting those techniques, check out this cooking resource for additional tips. Enjoy your apple cobbler journey!
Nutritional Facts for Apple Cobbler
When you’re learning how to make apple cobbler, it’s good to keep the nutritional aspects in mind, especially if you’re mindful of your health. Here’s a quick overview of what you’re working with:
Calories
A typical serving of apple cobbler contains around 300-400 calories. This can vary based on the specific ingredients you use, particularly the sugar and butter content. Using less sugar or substituting with healthier options can lighten the calorie count.
Fats
Most recipes yield about 15-20 grams of fat per serving. A significant portion comes from butter, which is the main ingredient in the crust. Opting for a light butter or a heart-healthy fat could reduce this.
Sugars
Apple cobbler generally packs in about 20-30 grams of sugar depending on how sweet your apples are and how much added sugar you incorporate. Consider experimenting with natural sweeteners like honey or maple syrup for a reduced sugar option.
For more insights on healthy dessert alternatives, you can check reputable sources like the American Heart Association here. Enjoy your delicious apple cobbler with a little knowledge about what you’re savoring!
FAQs about Apple Cobbler
Making the perfect apple cobbler can raise a few questions along the way. Whether you’re a novice baker or a seasoned pro, we’ve got you covered with some frequently asked questions.
Can I use frozen apples for the filling?
Absolutely! Using frozen apples is a great option if fresh ones aren’t available. Just be sure to thaw and drain any excess liquid before incorporating them into your apple cobbler filling. This will help prevent your cobbler from becoming too soggy. For added flavor, toss them with a bit of cinnamon and nutmeg before baking!
How can I store leftover cobbler?
To keep your leftover apple cobbler fresh, store it in an airtight container at room temperature for up to two days. If you want to keep it longer, consider refrigerating it for up to a week. For longer storage, you can freeze it! Just make sure it cools completely, wrap it tightly, and it can last in the freezer for about three months.
What’s the best way to reheat apple cobbler?
Reheating your apple cobbler is a breeze! For the best results, preheat your oven to 350°F (175°C) and bake your cobbler for about 15-20 minutes. This will warm it thoroughly while keeping the topping crisp. If you’re in a hurry, microwaving a slice for about 30 seconds works too, though the texture may suffer slightly.
For more tips on delicious desserts, check out Food Network and Bon Appétit. Happy baking!
Conclusion on Making Apple Cobbler at Home
Making apple cobbler at home is not only a delightful experience but also a fantastic way to impress friends and family with your culinary skills. By following this guide on how to make apple cobbler, you can create a warm, comforting dessert that has the perfect balance of sweetness and spice.
Remember, the key is to use fresh, high-quality ingredients – it makes a notable difference! You can experiment with variations, perhaps adding a scoop of vanilla ice cream on the side or using different fruits.
For more cooking tips, don’t hesitate to check out these kitchen hacks that could enhance your cooking experiences even further! Enjoy your delicious homemade apple cobbler!
PrintHow to Make Apple Cobbler: The Easy Ultimate Comfort Dessert

Learn how to make the perfect apple cobbler with this easy recipe that combines tender apples with a buttery, biscuit-like topping.
- Prep Time: 20 minutes
- Cook Time: 50 minutes
- Total Time: 1 hour 10 minutes
- Yield: 8 servings 1x
- Category: Dessert
- Method: baking
- Cuisine: American
- Diet: vegetarian
Ingredients
- 6 cups sliced apples
- 1 cup sugar
- 1 cup all-purpose flour
- 1 cup brown sugar
- 1 teaspoon cinnamon
- 1/2 teaspoon nutmeg
- 1/2 cup unsalted butter, melted
- 1 cup milk
- 1 tablespoon baking powder
- 1/2 teaspoon salt
Instructions
- Preheat your oven to 350°F (175°C).
- In a large bowl, mix the sliced apples with sugar, cinnamon, and nutmeg. Pour this into a greased baking dish.
- In another bowl, combine the flour, brown sugar, baking powder, and salt. Gradually stir in the milk and melted butter until just combined.
- Pour the batter over the apples, spreading it evenly.
- Bake for 45-50 minutes or until the top is golden brown and a toothpick comes out clean.
Notes
- Add vanilla extract to the apple mixture for enhanced flavor.
- Serve warm with ice cream for a perfect dessert experience.
Nutrition
- Serving Size: 1 piece
- Calories: 350
- Sugar: 25g
- Sodium: 150mg
- Fat: 10g
- Saturated Fat: 6g
- Unsaturated Fat: 4g
- Trans Fat: 0g
- Carbohydrates: 58g
- Fiber: 3g
- Protein: 3g
- Cholesterol: 30mg
Keywords: How to make Apple Cobbler