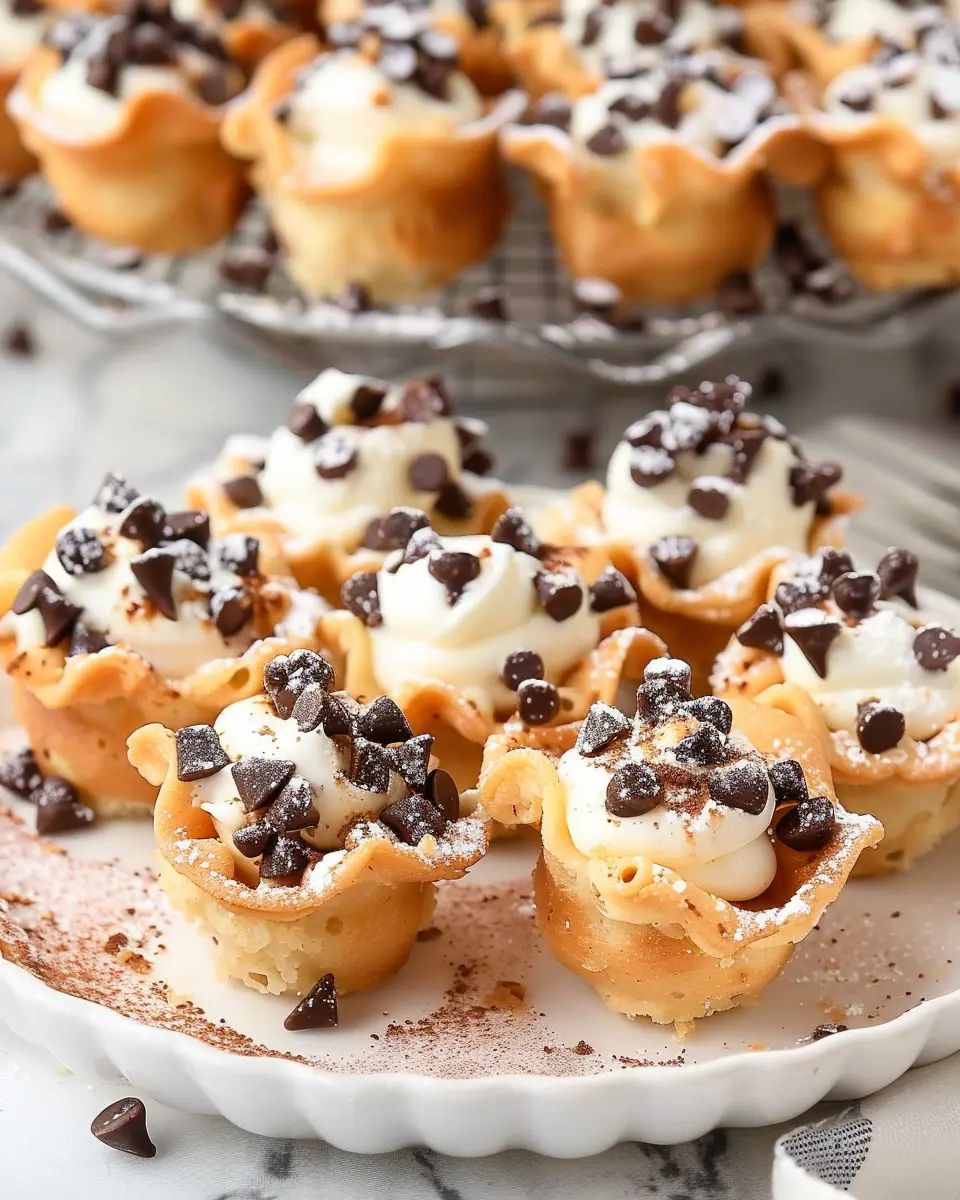
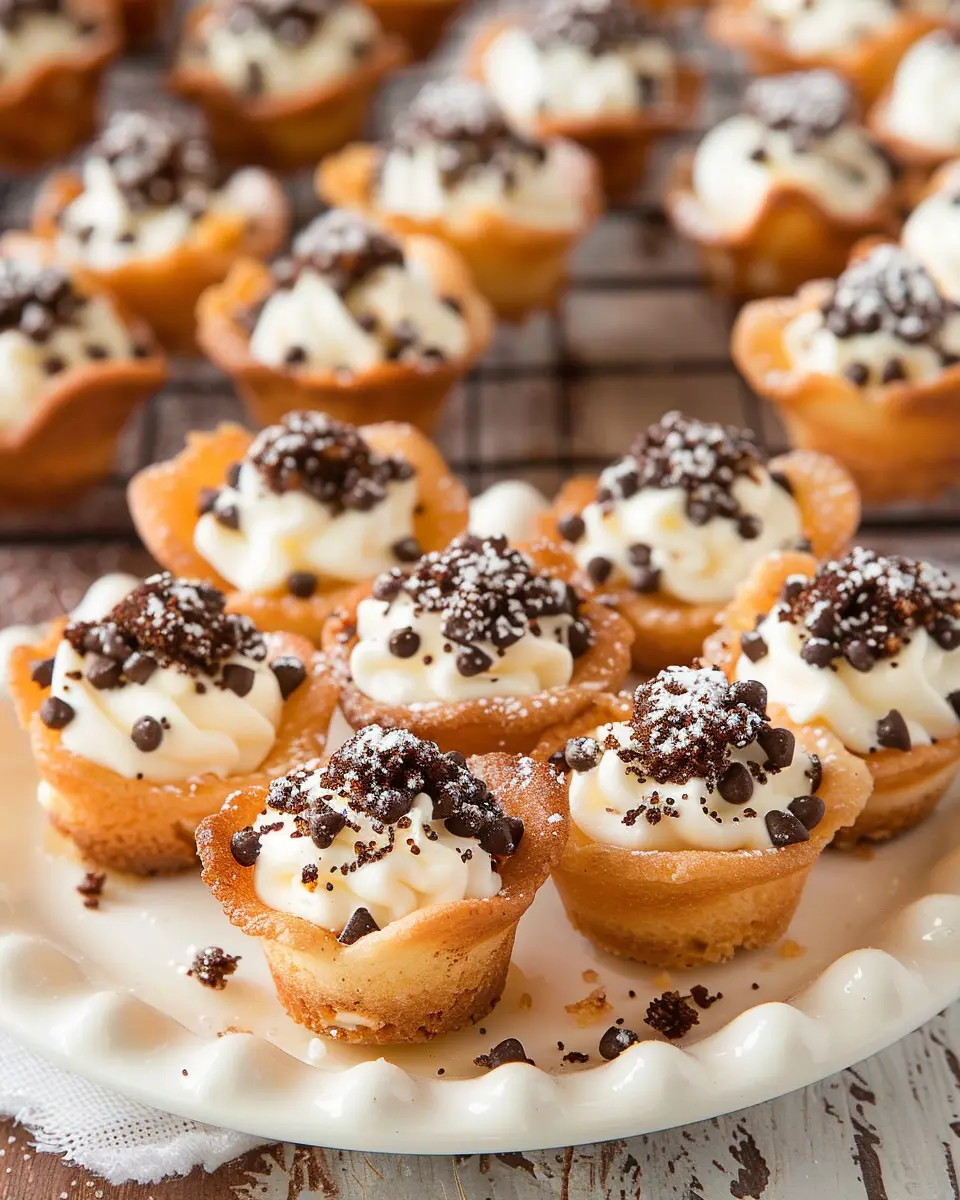
Introduction to Mini Cannoli Cups
If you’re a young professional juggling the hustle of deadlines and social engagements, Mini Cannoli Cups are about to become your go-to dessert. These delightful treats are a perfect blend of convenience and flavor, making them a game-changer when you’re short on time but still want to impress. Whether you’re hosting a gathering or simply treating yourself after a long week, these mini desserts deliver a taste of Italy in bite-sized portions.
Why Mini Cannoli Cups are a Game-Changer for Young Professionals
Let’s face it: finding time to whip up an elaborate dessert can feel impossible amid a busy schedule. Traditional cannoli, with their intricate filling and crispy shells, can be a bit daunting. Enter the Mini Cannoli Cups! These beauties offer all the deliciousness of classic cannoli without the hassle.
-
Quick and Easy: Preparing cannoli filling is straightforward. With only a handful of ingredients like ricotta cheese and powdered sugar, you can whip up your filling in no time. The best part? You can use pre-made pastry shells or even cookie cups if you’re in a serious time crunch.
-
Portion Control: Mini desserts not only look adorable but also help with portion control. It’s easy to overindulge with full-size desserts, but with Mini Cannoli Cups, you can enjoy a sweet treat without the guilt.
-
Versatile Options: Want to mix things up? Try adding different flavors to your filling, like chocolate chips or citrus zest. The options are endless, making each batch a unique creation.
Plus, they’re perfect for entertaining! Your friends and colleagues will be clamoring for the recipe, and you can bask in the spotlight without revealing how simple they are to make.
If you’re curious about creative ways to enhance your desserts or need quick meal prep ideas, check out resources like Food Network for inspiration and tips.
So, why not give Mini Cannoli Cups a try? These little gems may just become your favorite dessert to whip up when time is tight, and your sweet tooth is calling.
Ingredients for Mini Cannoli Cups
When it comes to crafting delightful mini cannoli cups, the right combination of ingredients is key. Let’s dive into what you’ll need for both the crust and the filling to create these delectable treats.
Essential ingredients for the crust and filling
For the crust, you’ll want:
- Flour: The base for creating a flaky texture.
- Butter: Adds richness and flavor; unsalted is preferred.
- Sugar: Just a touch to sweeten the crust.
- Eggs: Helps bind the mixture.
- Cocoa powder: Optional, but for chocolate-loving fans, it adds depth.
For the filling:
- Ricotta cheese: The star ingredient for creaminess.
- Powdered sugar: For that perfect sweetness.
- Vanilla extract: A splash for added flavor.
- Chocolate chips: Semi-sweet or dark for a nice contrast.
Optional garnish choices to elevate the presentation
To make your mini cannoli cups look extra appealing, consider these garnish options:
- Chopped pistachios: Adds a nice crunch and vibrant color.
- Maraschino cherries: A classic choice for a pop of brightness.
- Dusting of cocoa powder or powdered sugar: For that elegant finishing touch.
Want more creative ideas? Check out this guide on dessert garnishing for inspiration! With these ingredients, your mini cannoli cups are sure to impress at any gathering.
Preparing Mini Cannoli Cups
After gathering all your ingredients and inspiration, it’s time to dive into the delightful world of mini cannoli cups. These bite-sized treats are perfect for any gathering or just a cozy night in. Let’s keep it simple and fun—here’s how to make these delicious desserts at home!
Preheat and Prepare Your Baking Equipment
Before anything else, start by preheating your oven to 375°F (190°C). This step is crucial, as it ensures that your mini cannoli cups bake evenly and get that delightful crunch. While the oven warms up, you can prepare your baking equipment:
- Lightly grease a mini muffin tin with a bit of unsalted butter or non-stick spray.
- Gather a rolling pin, a clean surface for rolling dough, and a sharp knife or pizza cutter for easy cutting.
As always, clean kitchen tools are a chef’s best friend! For more tips on kitchen prep, feel free to check out The Kitchn’s Kitchen Essentials.
Make the Cannoli Crust
Now, let’s get into the heart of your mini cannoli cups: the crust. You’ll need some basic ingredients like flour, sugar, cinnamon, and a dash of salt. Here’s how to whip it up:
- Combine dry ingredients: In a bowl, mix 1 ½ cups of all-purpose flour, 2 tablespoons of sugar, ½ teaspoon of cinnamon, and a pinch of salt.
- Add wet ingredients: Add 1 egg yolk and 2 tablespoons of melted butter to the mixture. Gradually fold in a splash of milk until the dough comes together.
- Knead the dough: On a floured surface, knead for about 2 minutes until smooth. Cover with plastic wrap and let it rest for about 20 minutes. Resting helps to develop flavor and texture!
Once the dough is rested, roll it out to about 1/8-inch thick, and cut circles with a diameter of 3 inches to fit your mini muffin tin.
Prepare the Creamy Filling
While the crust is resting, you can work on the star of the show—the creamy filling! Here’s what you’ll need:
- 16 oz of ricotta cheese (drained for extra creaminess)
- 1 cup of powdered sugar
- 1 teaspoon of vanilla extract
- 1/2 cup of mini chocolate chips or candied fruit
Simply mix the ricotta cheese, powdered sugar, and vanilla extract in a bowl until well combined and creamy. Stir in the chocolate chips or candied fruit for that classic cannoli flavor. The sweetness of the filling is what makes mini cannoli cups irresistible!
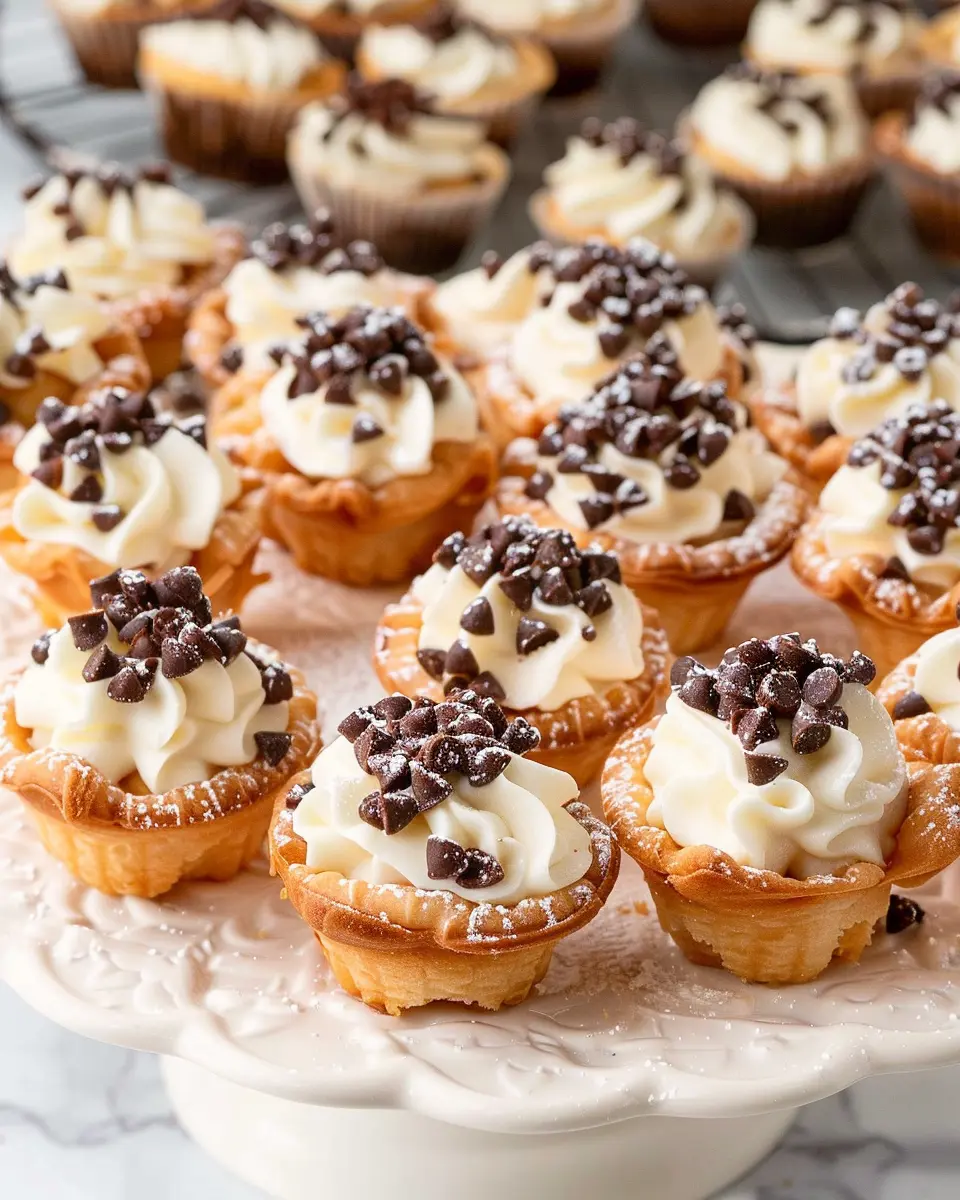
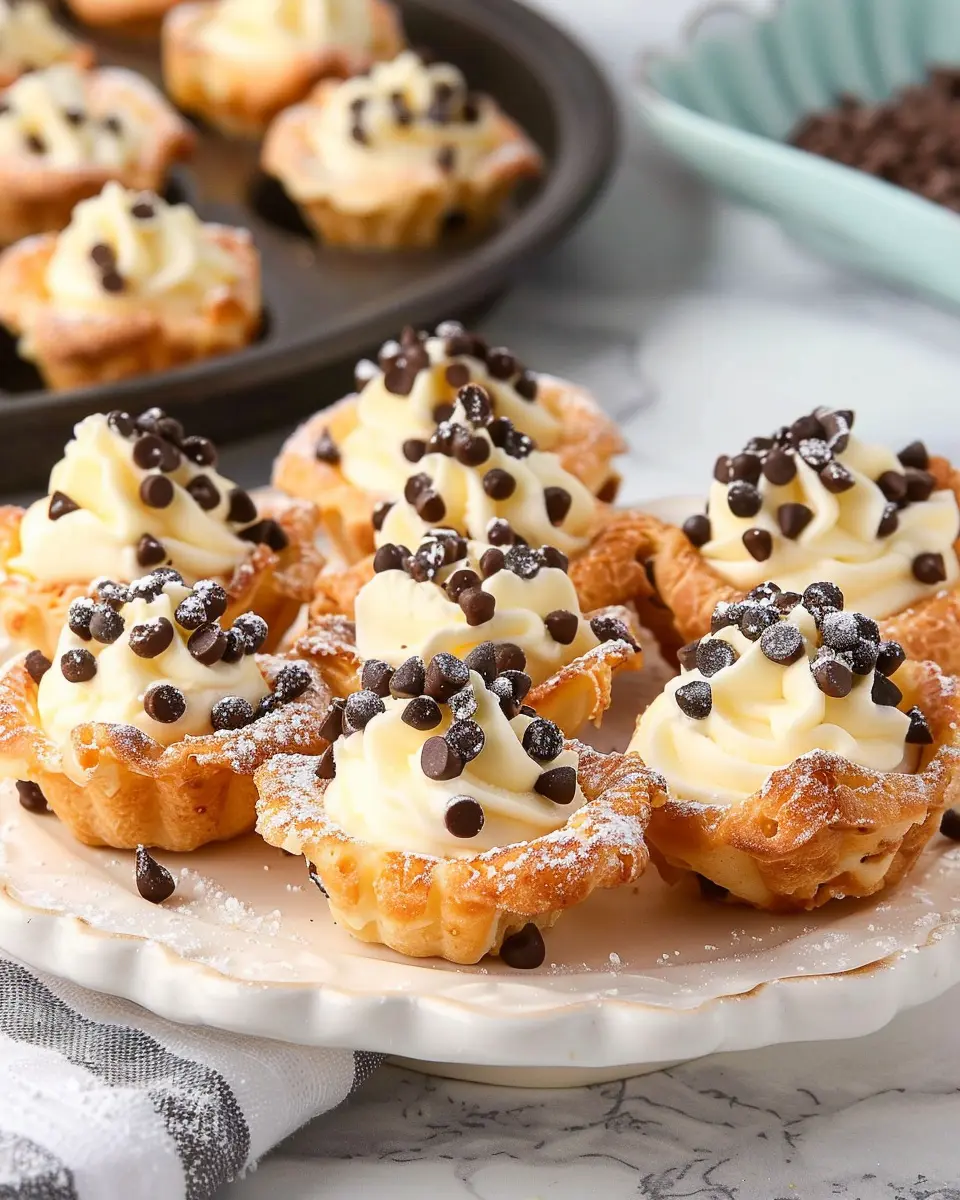
Fill the Cups and Garnish
Once your mini cups are baked to a lovely golden brown, it’s time to fill them with that heavenly filling. Here’s how to make it look extra special:
- Cool the cups: Let the crusts cool in the tin for about 5 minutes before transferring them to a wire rack to cool completely.
- Fill each cup: Use a piping bag or a spoon to generously fill each crust with the creamy mixture.
- Garnish: Top with a sprinkle of powdered sugar or a few extra chocolate chips for a finishing touch.
Remember, presentation matters! You want your mini cannoli cups to look as delicious as they taste.
Serve and Enjoy
Your mini cannoli cups are now ready to wow your friends and family! Serve them on a beautiful platter and watch your guests’ eyes light up. They’re perfect for parties, dessert buffets, or simply as an indulgent treat at the end of a long week.
Not sure how to store leftovers? You can keep them in an airtight container in the fridge for up to 2 days, although I highly doubt they’ll last that long!
So, roll up your sleeves and enjoy the process of creating these delightful mini cannoli cups. You’ll be amazed at how a few simple ingredients can come together to create something so delectable! Happy baking!
Variations on Mini Cannoli Cups
Mini cannoli cups are a delightful take on the classic Italian pastry, and the best part? You can customize them to suit your taste! Let’s explore two exciting variations that will add a twist to your homemade treats.
Chocolate and Hazelnut Twist
If you have a sweet tooth, why not indulge in a chocolate and hazelnut version of your mini cannoli cups? By incorporating Nutella into your filling, you can create a creamy, dreamy experience that’s hard to resist. Here’s how to do it:
- Ingredients: 1 cup of ricotta cheese, ½ cup of Nutella, ½ cup of powdered sugar, and mini chocolate chips for garnish.
- Instructions:
- Blend the ricotta, Nutella, and powdered sugar until smooth.
- Fill your mini cups with this luscious filling and top with mini chocolate chips for that extra crunch.
This twist not only adds a rich chocolate flavor but also brings a nutty richness that pairs beautifully with the crispness of the cannoli shells. Combine flavors and textures for a perfect dessert that will leave your friends wanting more!
Seasonal Fruit-Infused Filling Options
Embrace seasonal produce with fruit-infused filling options for your mini cannoli cups. Fresh fruits can elevate the traditional recipe, bringing a refreshing and vibrant touch. Here are a few ideas to inspire you:
- Summer Berries: Mash strawberries, blueberries, or raspberries for a berry bliss filling. Simply blend your chosen fruit with ricotta and a touch of honey for sweetness.
- Autumn Spice: Try adding pumpkin puree and a sprinkle of cinnamon to your ricotta. This seasonal flavor will remind you of cozy fall evenings.
- Citrus Burst: Orange or lemon zest added to the filling can brighten it up and offer a zesty kick that contrasts beautifully with the creaminess.
These variations not only keep the mini cannoli cups fresh and exciting but also allow you to showcase the incredible flavors of each season. Plus, it’s a fantastic way to impress your guests while keeping your dessert options exciting.
For more inspiration, check out creative recipes on The Spruce Eats or Epicurious that delve into the world of custards and creams that pair beautifully with these beloved pastries. Enjoy the creativity!
Cooking Tips and Notes for Mini Cannoli Cups
Tips for perfecting the crust
To create mini cannoli cups that truly shine, the crust is pivotal. Aim for a balance of crispness without being overbaked. When rolling out the dough, ensure it’s about 1/8 inch thick for that perfect crunch. Use a combination of flour and cornstarch for added tenderness. If you’re feeling adventurous, try adding a hint of cinnamon or cocoa to the dough for extra flavor.
Don’t forget to fry them at the right temperature—around 360°F (182°C)—to achieve a golden-brown finish. If you’re unsure about oil temperature, utilize a deep-fry thermometer or test with a scrap of dough. Once they reach that perfect color, let them cool on paper towels to absorb excess oil.
Notes on storing and serving
When it comes to mini cannoli cups, storage is key to maintaining their delightful texture. Store the shells separately from the filling; this way, they’ll stay crispy longer. You can keep the shells in an airtight container at room temperature for up to two days, while the filling can be refrigerated for about a week.
For serving, fill the cups just before you’re ready to enjoy them. This ensures a fresh bite every time. And for a fun presentation, top with chocolate chips, chopped nuts, or a drizzle of melted chocolate. If you want to elevate your serving game, check out resources like Joy of Baking for more creative ideas!
With these tips and notes in your arsenal, you’ll be well on your way to making unforgettable mini cannoli cups that impress every time.
Serving Suggestions for Mini Cannoli Cups
Pairing with Coffee or Tea
When it’s time to indulge in mini cannoli cups, consider pairing them with your favorite coffee or tea. The rich, creamy filling of the cannoli balances beautifully with a robust espresso or a smooth cappuccino. If you prefer tea, a fruity herbal blend can provide a delightful contrast. The warmth of the drink enhances the nostalgic flavors of the cannoli, making for a comforting treat.
For an extra special touch, why not try a chai latte? The spices in chai beautifully complement the sweetness of the cannoli cups.
Creating a Dessert Platter
These mini cannoli cups shine when presented as part of a dessert platter. Imagine a vibrant spread featuring an array of sweets—think chocolate-covered strawberries, macarons, and biscotti alongside your cannoli cups. This variety not only elevates the visual appeal but also allows guests to mix and match flavors.
Consider adding a dip or two, like a rich chocolate sauce or a freshly made raspberry coulis. With a little creativity, your dessert board can become the star of any gathering!
For more creative platter ideas, check out Food Network’s dessert boards for inspiration.
Time Breakdown for Mini Cannoli Cups
Preparation Time
Getting started with your mini cannoli cups is a breeze! You’ll need about 20 minutes to gather your ingredients and prepare your filling. Make sure to set out everything you’ll need, including your ricotta cheese, powdered sugar, and any extras like chocolate chips or pistachios.
Cooking Time
After prep, it’s time to shine in the kitchen! Baking the cups will take approximately 15 minutes. Keep an eye on them to ensure they turn a lovely golden brown—this is where magic happens!
Total Time
In total, you’re looking at about 35 minutes from start to finish for these delightful treats. Perfect for when you need a quick dessert that packs a punch. If you want to learn more about baking techniques, check out this helpful article on baking basics. Get ready; these mini cannoli cups are going to be a hit!
Nutritional Facts for Mini Cannoli Cups
Calories per serving
If you’re indulging in mini cannoli cups, you’ll be pleased to know that each serving generally contains around 150 calories. This delightful treat is not only satisfying but allows you to enjoy a bit of sweetness without going overboard.
Key nutrients in the ingredients
These mini cannoli cups provide more than just a decadent taste. Here’s what’s packed into every bite:
- Calcium: A vital mineral for bone health that is abundant in ricotta cheese.
- Fiber: Depending on the shell ingredients, you may also find a good dose of dietary fiber, which helps with digestion.
- Protein: With ricotta and any nuts used, you’ll get a boost of protein, making this dessert more satisfying.
For more in-depth nutritional insights, consider visiting reputable sources like the USDA FoodData Central or NutritionData. Incorporating fun, guilt-free recipes like these into your routine keeps the joy in your culinary adventures while supporting your health!
FAQs about Mini Cannoli Cups
Can I make these cannoli cups ahead of time?
Absolutely! One of the beauties of mini cannoli cups is their flexibility. You can prepare the cups and the filling separately. Bake the shells and store them in an airtight container for up to two days. As for the filling, you can whip that up a day in advance too; just keep it in the fridge until you’re ready to assemble. Are you planning a gathering? This make-ahead option is a game-changer!
What can I substitute for ricotta cheese?
If ricotta isn’t your jam or if you’re looking for a lighter alternative, don’t fret! You can try using:
- Mascarpone cheese: This will give you that creamy texture while adding a hint of richness.
- Cottage cheese: Blend it until smooth for a healthier option.
- Greek yogurt: For a tangy kick and extra protein.
Each substitute brings its unique flavor profile, so feel free to experiment and find what suits your palate best!
What’s the best way to store leftovers?
Leftover mini cannoli cups can be a delightful treat for the next day! To keep them fresh, store the shells and filling separately:
- Shells: Store in an airtight container at room temperature. Crispiness is key!
- Filling: Refrigerate in a sealed container.
When you’re ready to enjoy the leftovers, simply fill the shells right before serving. This approach ensures that your treats stay wonderfully crunchy and delicious!
If you want more tips or recipe ideas, check out this helpful guide on dessert storage for maintaining your sweets. Enjoy your mini cannoli cups!
Conclusion on Mini Cannoli Cups
Why you should try making these delightful treats today!
If you haven’t already been convinced, it’s time to fall in love with mini cannoli cups! These delightful treats are not only simple to make but also perfect for impressing your guests at any gathering. The crisp pastry shell holds a creamy ricotta-filled center that you can customize according to your taste—think chocolate chips or citrus zest. Plus, they make for a great conversation starter!
Imagine serving these at your next dinner party or casual get-together with friends—everyone will appreciate your culinary flair. There’s no reason to wait; grab the ingredients and start whipping up your own batch of mini cannoli cups today! For more tips and inspiration, check out resources like Food Network or Serious Eats. Happy baking!
PrintMini Cannoli Cups: Easy Indulgence for Your Sweet Tooth

Enjoy these delightful Mini Cannoli Cups that are perfect for satisfying your sweet tooth with a deliciously easy recipe.
- Prep Time: 15 minutes
- Cook Time: 0 minutes
- Total Time: 45 minutes
- Yield: 12 servings 1x
- Category: Dessert
- Method: No-bake
- Cuisine: Italian
- Diet: Vegetarian
Ingredients
- 1 cup ricotta cheese
- 1/2 cup powdered sugar
- 1 teaspoon vanilla extract
- 1/2 cup mini chocolate chips
- 12 mini phyllo cups
Instructions
- In a mixing bowl, combine ricotta cheese, powdered sugar, and vanilla extract until smooth.
- Fold in mini chocolate chips.
- Spoon the filling into the mini phyllo cups.
- Chill for at least 30 minutes before serving.
- Garnish with extra chocolate chips if desired.
Notes
- These can be made a day ahead to save time.
- For a twist, add citrus zest to the filling.
Nutrition
- Serving Size: 1 cup
- Calories: 120
- Sugar: 10g
- Sodium: 50mg
- Fat: 7g
- Saturated Fat: 4g
- Unsaturated Fat: 2g
- Trans Fat: 0g
- Carbohydrates: 12g
- Fiber: 1g
- Protein: 2g
- Cholesterol: 15mg
Keywords: Mini Cannoli Cups, dessert, sweet, easy recipe